 Save to Pinterest
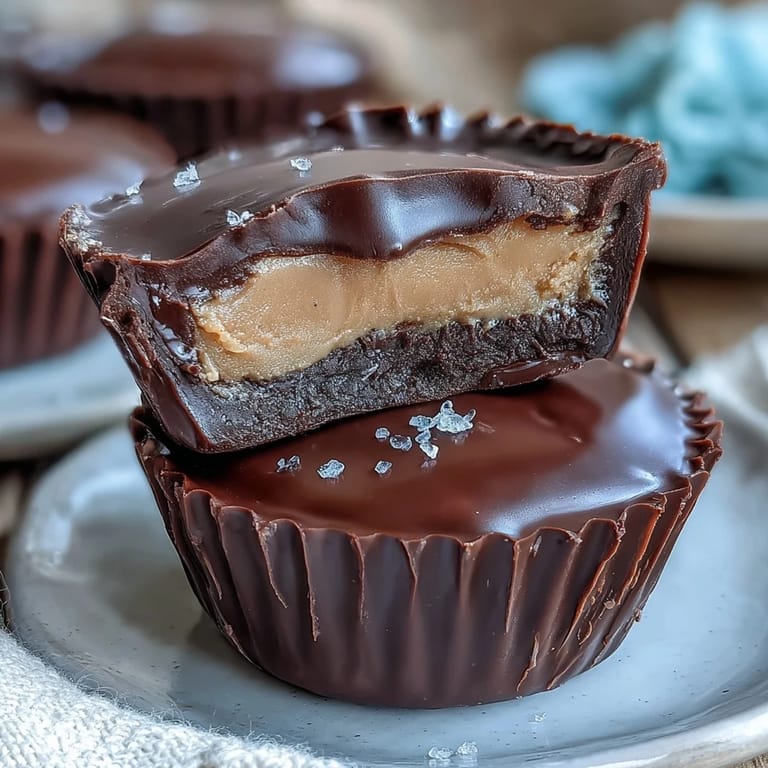
 There is something deeply satisfying about biting into a homemade peanut butter cup — the snap of dark chocolate giving way to a creamy, lightly salted peanut butter center that melts on your tongue. These Homemade Reese's Peanut Butter Cups with Dark Chocolate are a love letter to that classic indulgence, elevated with rich 70% cocoa dark chocolate and a silky filling made from real ingredients. Whether you are treating yourself on a quiet afternoon or sharing them with friends, these little cups deliver maximum reward for minimal effort.
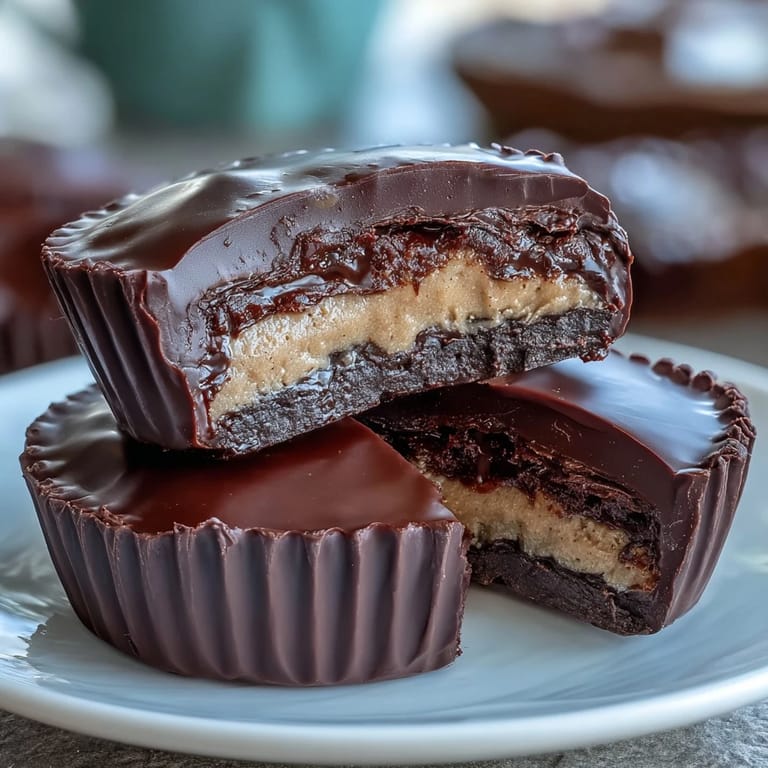
Save to Pinterest The magic of these cups lies in the contrast of textures and flavors. The dark chocolate shell is smooth and glossy, with a satisfying firmness straight from the refrigerator. Inside, the peanut butter filling is dense and creamy, gently sweetened with powdered sugar and rounded out with a whisper of vanilla and a pinch of fine sea salt. Made in a standard mini muffin tin with simple paper liners, this recipe requires no special equipment — just a little patience while the chocolate sets.
Ingredients
Tired of Takeout? 🥡
Get 10 meals you can make faster than delivery arrives. Seriously.
One email. No spam. Unsubscribe anytime.
- Chocolate Layer:
- 250 g (9 oz) dark chocolate (70% cocoa or higher), chopped
- 1 tbsp coconut oil (optional, for smoother texture)
- Peanut Butter Filling:
- 120 g (½ cup) creamy peanut butter (unsweetened, unsalted preferred)
- 2 tbsp unsalted butter, softened
- 60 g (½ cup) powdered sugar, sifted
- ¼ tsp fine sea salt
- ½ tsp vanilla extract
Instructions
- Step 1 — Prepare the tin
- Line a 12-cup mini muffin tin with paper liners.
- Step 2 — Melt the chocolate
- Melt the dark chocolate and coconut oil together in a heatproof bowl set over a pan of simmering water, or microwave in short bursts, stirring until smooth.
- Step 3 — Form the chocolate base
- Spoon about 1 teaspoon of melted chocolate into the bottom of each muffin liner. Tilt or use a spoon to coat the sides slightly. Chill in the freezer for 10 minutes to set.
- Step 4 — Make the peanut butter filling
- Meanwhile, in a medium bowl, mix peanut butter, butter, powdered sugar, salt, and vanilla extract until smooth and thick.
- Step 5 — Add the filling
- Roll about 1 teaspoon of the peanut butter mixture into a ball, flatten slightly, and place onto the set chocolate bases. Gently press down to create an even layer, leaving a small border around the edge.
- Step 6 — Seal with chocolate
- Spoon the remaining melted chocolate over the peanut butter layers, covering completely. Tap the tin gently to smooth the tops.
- Step 7 — Chill
- Chill in the refrigerator for at least 30 minutes, or until fully set.
- Step 8 — Serve and store
- Remove cups from liners and serve. Store in an airtight container in the refrigerator for up to 1 week.
Zusatztipps für die Zubereitung
Damit die Schokoladenschicht besonders glatt und glänzend wird, empfiehlt es sich, die Schokolade langsam und gleichmäßig über einem Wasserbad zu schmelzen und dabei kontinuierlich zu rühren. Das Kokosnussöl ist optional, sorgt aber für eine seidig-geschmeidige Konsistenz, die das Überziehen erleichtert. Die Erdnussbutterfüllung sollte fest genug sein, um sich formen zu lassen — falls sie zu weich ist, kurz im Kühlschrank anziehen lassen, bevor die Kugeln geformt werden. Achte darauf, beim Andrücken der Füllung einen kleinen Rand frei zu lassen, damit die obere Schokoladenschicht sauber abschließt. Für ein besonders gleichmäßiges Ergebnis kannst du einen kleinen Teelöffel oder eine Miniportion-Schöpfkelle verwenden.
Varianten und Anpassungen
Diese Erdnussbutter-Cups lassen sich auf viele Arten abwandeln. Wer eine vegane Version möchte, ersetzt die Butter durch pflanzliche Margarine und verwendet eine vegane Zartbitterschokolade ohne Milchzusätze. Für eine nussige Abwechslung lässt sich die Erdnussbutter problemlos durch Mandel- oder Cashewmus ersetzen — der Charakter der Füllung verändert sich leicht, bleibt aber genauso cremig und köstlich. Wer es noch intensiver mag, kann die Füllung mit einer Prise Kakaopulver oder einem Hauch Zimt verfeinern. Für eine festliche Optik eignet sich ein Topping aus gehackten Nüssen oder einem Spritzer geschmolzener weißer Schokolade nach dem abschließenden Kühlschritt.
Serviervorschläge
Die Erdnussbutter-Cups schmecken am besten leicht gekühlt, direkt aus dem Kühlschrank. Sie passen wunderbar zu einer Tasse frisch gebrühtem Kaffee, dessen Bitterkeit die Süße der Schokolade perfekt ausbalanciert. Auch ein Glas kalte Milch ist ein klassischer und unschlagbarer Begleiter. Als Dessert nach einem Dinner lassen sie sich dekorativ auf einem Tablett anrichten und mit einem Hauch Fleur de Sel bestreuen — das gibt ihnen einen eleganten, gourmetartigen Auftritt. Sie eignen sich auch hervorragend als Mitbringsel, verpackt in einer kleinen Box oder einer hübschen Tüte.
 Save to Pinterest
 Once you have made these homemade peanut butter cups, it is hard to go back to the store-bought version. The combination of deeply dark, slightly bitter chocolate and a smooth, gently salted peanut butter center is timeless — and making them yourself means you are in full control of every ingredient. Stored in an airtight container in the refrigerator, they keep for up to one week, though in most households they disappear long before that. A simple recipe, a handful of quality ingredients, and a little patience — that is all it takes to create something truly irresistible.
Recipe FAQs
- → What type of chocolate works best?
Use dark chocolate with 70% cocoa or higher for rich flavor and smooth texture.
- → Can I make these cups vegan?
Yes, substitute dairy butter with a plant-based alternative and choose dairy-free chocolate.
- → How should I store the cups?
Keep them in an airtight container in the refrigerator for up to one week to maintain freshness.
- → Can I add flavors to the peanut butter filling?
Absolutely, vanilla extract is classic but almond or cashew butter variations add a nice twist.
- → Is it important to chill between layers?
Yes, chilling helps the chocolate set properly, ensuring neat layers and better texture.
- → Can I use powdered sugar alternatives?
Sifted powdered sugar is best for smooth filling, but you may try substitutes like erythritol carefully.