 Save to Pinterest
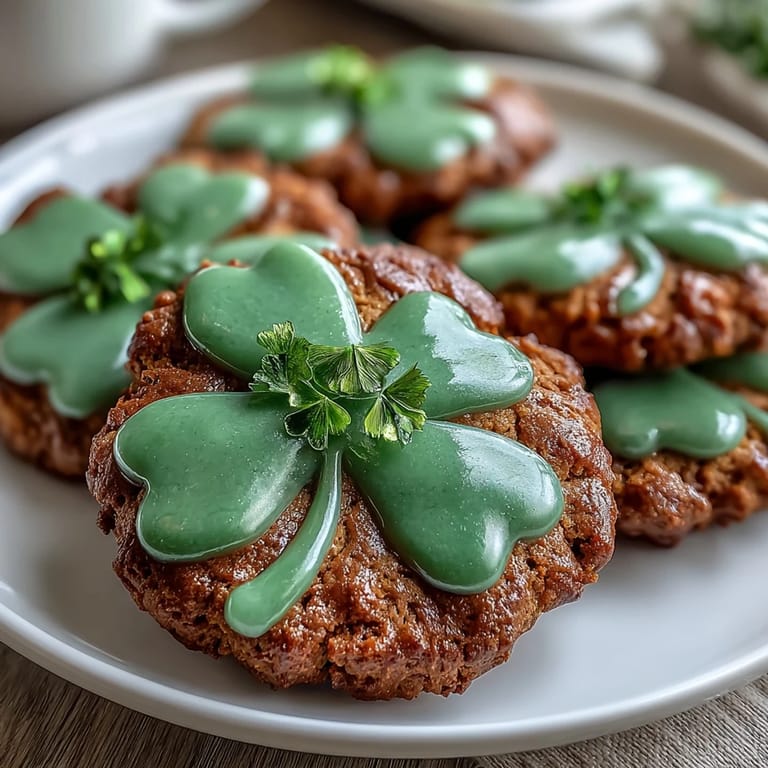
 My kitchen smelled like butter and vanilla the morning my neighbor stopped by with her kids, who were buzzing about St. Patrick's Day festivities. She mentioned wishing she had shamrock cookies to bring to their school party, and something clicked—I'd never actually made shaped sugar cookies before, always defaulting to drop cookies or bars. By that afternoon, I had flour dusting my counters and three shades of green food coloring lined up, determined to nail the icing. Those first cookies came out perfectly golden, and watching the kids' faces light up when they saw the vibrant green shamrocks was worth every minute of concentration.
There's something about piping icing onto cookies that feels more like art than baking—my hands were actually shaking a little on the first one, worried I'd mess it up. Once I relaxed and let the piping bag do the work, I fell into a rhythm that was almost meditative. An hour later, watching that glossy green set under the kitchen lights, I understood why people get obsessed with cookie decorating.
Ingredients
- All-purpose flour: The foundation that keeps these cookies tender and shapeable; make sure to spoon and level rather than scooping straight from the bag, which compacts the flour.
- Unsalted butter: Softened to room temperature is non-negotiable here—cold butter won't cream properly, and you'll lose that light, fluffy texture that makes these cookies melt on your tongue.
- Granulated sugar: Works with the butter to create structure; this pairing is what gives you cookies that hold their shape during baking.
- Egg: Binds everything together and adds richness; one large egg is the sweet spot for this batch size.
- Vanilla and almond extracts: Vanilla is essential, but almond extract adds a subtle sophistication that makes people ask what your secret ingredient is.
- Powdered sugar and meringue powder: The meringue powder is the secret to icing that dries hard enough to stack cookies without smudging the decoration.
- Green gel food coloring: Use gel, not liquid—it won't thin your icing and produces a more vibrant shade that looks genuinely festive.
Tired of Takeout? 🥡
Get 10 meals you can make faster than delivery arrives. Seriously.
One email. No spam. Unsubscribe anytime.
Instructions
- Mix your dry ingredients first:
- Whisk flour, baking powder, and salt in a medium bowl and set aside—this prevents lumps and distributes the leavening evenly.
- Cream butter and sugar until fluffy:
- Beat them together for a full two minutes; you're not just mixing, you're incorporating air that makes the cookies tender. Stop when it looks pale and cloud-like.
- Add the egg and extracts:
- Beat until everything is fully combined and smooth, scraping down the bowl to make sure no streaks of butter remain.
- Gently fold in the dry ingredients:
- Mix just until the dough comes together—overworking here makes cookies tough. A few streaks of flour are fine; stop as soon as you don't see dry spots.
- Chill the dough properly:
- Wrap in plastic and refrigerate for at least an hour; this prevents excessive spreading in the oven and makes rolling much easier. You can even chill overnight.
- Preheat and prepare your workspace:
- Heat the oven to 350°F while you lightly flour your work surface. Having everything ready keeps the remaining dough cool.
- Roll and cut with precision:
- Roll dough to exactly 1/4-inch thickness; too thin and edges brown before centers cook, too thick and they stay doughy. Use a light touch with the flour so cookies don't dry out.
- Space them wisely on the pan:
- One inch apart gives them room to puff slightly without touching. Parchment paper prevents sticking and browning bottoms.
- Bake until golden edges appear:
- Watch for the moment when the edges just begin to turn golden—they continue cooking on the hot pan. Eight to ten minutes is the window; pull them slightly early if you prefer softer cookies.
- Cool with intention:
- Leave on the pan five minutes so they firm up, then transfer to a rack. Cooling completely is crucial before icing, or the warmth will melt it.
- Make royal icing smooth and glossy:
- Beat powdered sugar and meringue powder with water and vanilla on low speed for five to seven minutes until it reaches a glossy, smooth consistency. This takes longer than you'd expect.
- Color to perfection:
- Add gel food coloring a tiny drop at a time, mixing thoroughly between additions. The color deepens as it sits, so go slightly lighter than your target shade.
- Pipe with confidence:
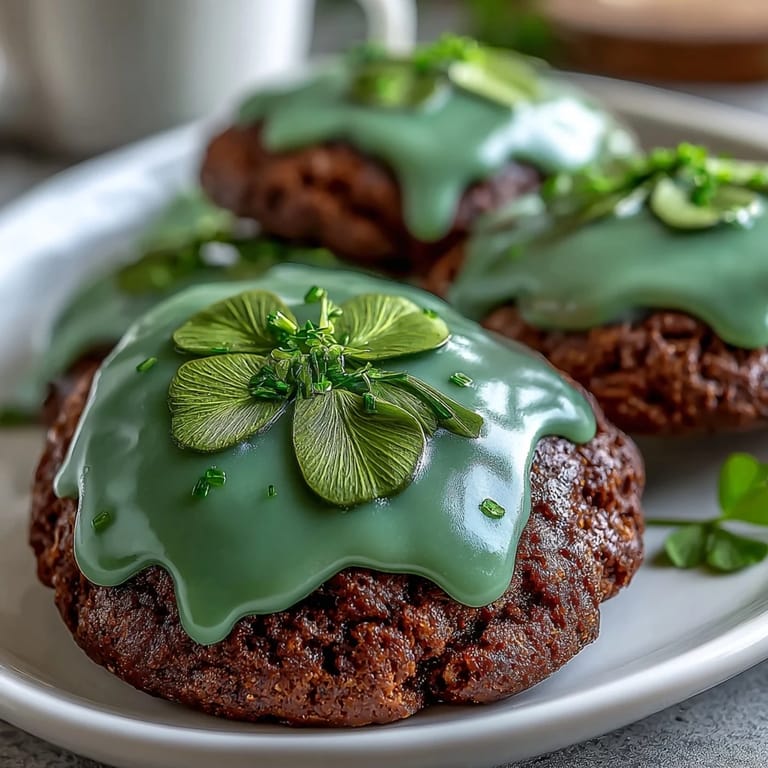
- Transfer to a piping bag and outline each shamrock first, then flood the center. The icing should flow slightly but not run off the cookie.
- Let icing set completely:
- Wait at least an hour before stacking or moving them. Patience here keeps your decorations pristine.
 Save to Pinterest
 Later that week, my neighbor sent a photo of her daughter holding up a shamrock cookie at the school party, beaming like she'd made them herself. I realized that baking these wasn't just about the end result—it was about creating something that made someone else's day brighter, which is the whole point of holidays anyway.
Storage and Make-Ahead Tips
These cookies are remarkably forgiving when it comes to timing. You can bake the dough up to three days ahead, keeping it wrapped in the fridge, or even freeze it for up to two months—just thaw it in the refrigerator before rolling and cutting. Once baked and cooled, undecorated cookies stay fresh in an airtight container for up to a week. If you're decorating ahead of time, store them flat in a single layer with parchment between rows; they'll hold their icing intact for at least five days, making them perfect for preparing the day before a gathering.
Customizing Your Shamrocks
The beauty of this recipe is how much room it gives you to play with color and embellishment. I've seen people use different shades of green for ombre effects, mixing pale and deep green, and it looks stunning. You can also add a touch of personality by sprinkling edible glitter or pearl dust into the wet icing, or dotting the surface with gold luster dust before it sets for that shimmery, celebratory look.
Troubleshooting and Common Questions
If your dough is too soft to roll, it needs more chill time—even fifteen minutes in the freezer can make a difference. If your icing is too thick and won't pipe smoothly, add water one teaspoon at a time until it flows easily; if it's too thin and won't hold its shape, let it sit for a few minutes as the powdered sugar continues to absorb the liquid. Should cookies spread too much in the oven, your butter was likely too warm—always check that it's just soft enough to press your finger into without leaving a dent, not melting or greasy to the touch.
- Cookies browning too fast? Lower oven temperature by 25 degrees and add a few minutes to baking time.
- Icing looks dull instead of glossy? You likely didn't beat it long enough—return it to the mixer for another minute or two.
- Worried about the almond extract? Vanilla alone is perfectly fine, or try 1/4 teaspoon of lemon extract for a brighter flavor.
 Save to Pinterest
 These shamrock cookies have become my go-to for St. Patrick's Day, but honestly, they work for any celebration that needs a pop of color and a touch of homemade charm. There's real magic in baking something this special for people you care about.
Recipe FAQs
- → How do I keep the shamrock shapes crisp during baking?
Chilling the dough for at least an hour before rolling helps maintain sharp edges and prevents spreading in the oven.
- → Can I substitute almond extract in the dough?
Yes, almond extract is optional and can be omitted or replaced with an equal amount of vanilla extract for a milder flavor.
- → What is the best way to achieve vibrant green royal icing?
Use gel food coloring for concentrated color without altering the icing consistency; add gradually to reach desired shade.
- → How long should cookies cool before icing?
Allow cookies to cool completely on a wire rack to prevent melting or sliding of the royal icing.
- → How can I store these decorated cookies?
Store in an airtight container at room temperature for up to one week to maintain freshness and icing texture.