 Save to Pinterest
 My neighbor knocked on the door one Saturday morning with a basket of strawberries so ripe they practically glowed, and I suddenly had to prove myself in the kitchen. Hand pies seemed like the perfect answer, the kind of thing you could hold in one hand while walking through a summer farmers market or spreading a blanket in the park. There's something about biting into warm, flaky pastry that gives way to jammy fruit that feels both fancy and completely unpretentious at the same time.
I made these for a surprise picnic on a Thursday evening, stuffing them still-warm into a picnic basket while my roommate watched skeptically from the kitchen doorway. By the time we'd hiked up to the overlook, they were just cool enough to eat, and I watched her bite into one with zero expectations suddenly transform into genuine delight. That moment, sitting on a blanket with crumbs on our laps and strawberry juice on our fingers, made every bit of butter under my fingernails worth it.
Ingredients
- All-purpose flour: The structure of everything, and keeping it cold until the very last second is what gives you those shatteringly crisp layers.
- Cold unsalted butter: This is non-negotiable, and honestly, I keep mine in the freezer until the moment I need it because warm butter is the enemy of flaky pastry.
- Ice water: Add it slowly and resist the urge to overwork the dough, which is where most people's pie dreams go to die.
- Fresh strawberries: Pick ones that smell like summer, and don't wash them until you're ready to hull and dice them or they'll get waterlogged.
- Cornstarch: This magic powder soaks up all that strawberry juice so your filling isn't a soggy mess, and the filling actually holds together when you bite into it.
- Lemon juice and vanilla: These aren't shy additions—they brighten the strawberries and make people ask what your secret ingredient is.
- Egg wash: One beaten egg brushed on top is what creates that gorgeous golden shine that makes these look like they came from a bakery.
- Coarse sugar: The texture adds something the filling can't, a little sparkle and crunch that feels like dessert should feel.
Tired of Takeout? 🥡
Get 10 meals you can make faster than delivery arrives. Seriously.
One email. No spam. Unsubscribe anytime.
Instructions
- Make your dough and chill it properly:
- Whisk together flour, sugar, and salt, then cut in your ice-cold butter until it looks like coarse breadcrumbs with some pea-sized pieces still visible. Add ice water a tablespoon at a time, mixing just until everything comes together, and if your dough feels warm, your hands are working too hard—use a pastry blender or fork instead. Divide in half, shape into flat disks, wrap tightly, and give the dough at least an hour to rest in the refrigerator because this is where the magic actually happens.
- Prep your strawberry filling while the dough chills:
- Toss your diced strawberries with sugar, cornstarch, lemon juice, vanilla, and a pinch of salt, then let everything sit together for about ten minutes while the strawberries release their juices and the flavors meld. This macerating step is when you can hear them starting to break down slightly, and the mixture will look a little wetter and shinier.
- Roll, cut, and fill your dough:
- Heat your oven to 400°F, line a baking sheet with parchment, and roll out one disk of dough to about 1/8 inch thick on a lightly floured surface. Cut out eight rectangles or circles (about 3 by 4 inches is perfect), place them on your prepared sheet, then spoon 2 to 3 tablespoons of strawberry filling into the center of each piece, leaving a border so the edges can seal.
- Create your lattice tops:
- Roll out your second disk of dough and cut matching shapes, then slice each one into six thin strips using a sharp knife or pastry wheel. Weave the strips over your filled bottoms in a classic criss-cross pattern, which sounds fussy but actually becomes meditative once you get the first one done, and trim any ragged edges.
- Seal, egg wash, and bake:
- Press the edges of each pie firmly to seal, then crimp them with a fork so they really stick together, brush the tops with beaten egg, and sprinkle generously with coarse sugar. Slide them into the oven for 22 to 25 minutes until they're golden brown and you can see the filling starting to bubble up slightly around the edges.
 Save to Pinterest
 There's something quietly magical about watching someone's face when they realize they can actually eat this without a plate. My mom took one to work the next day and texted me a photo of her coworkers gathered around her desk like pigeons, and I realized these little pies had become the thing people asked me to bring to gatherings.
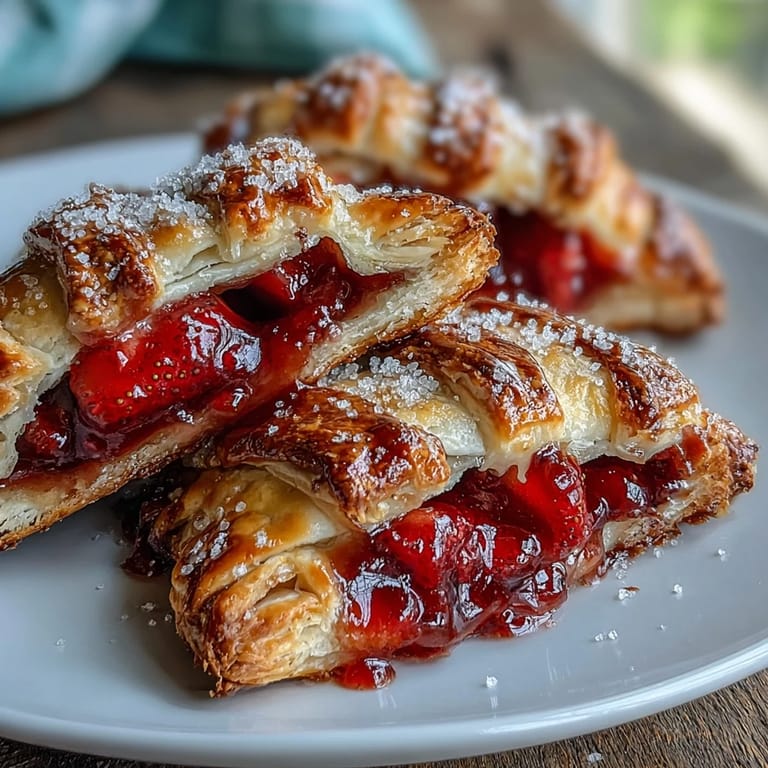
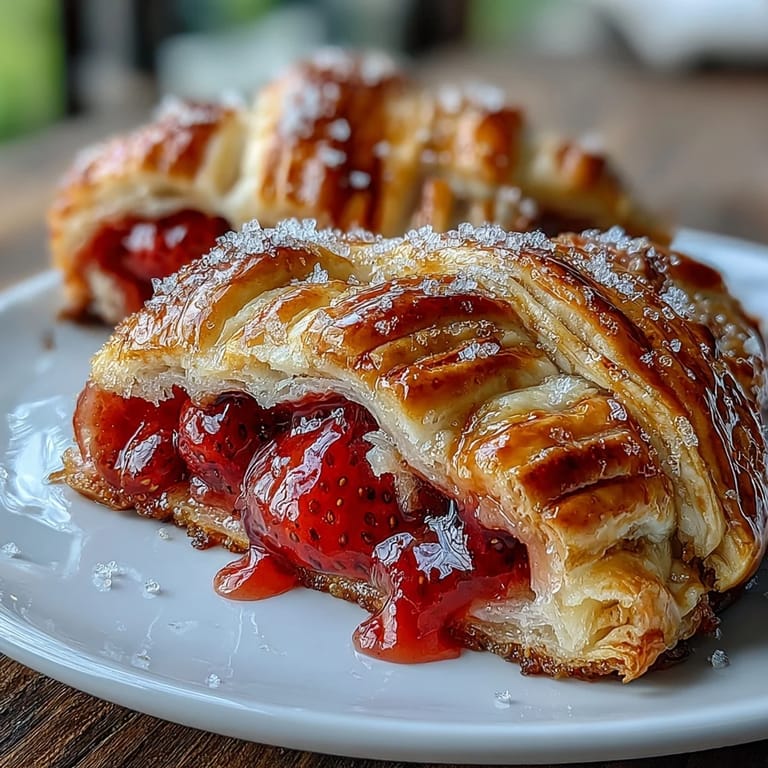
Why Lattice Matters More Than You'd Think
The lattice isn't just decoration, though it does make everything look three times fancier than it actually is. Those little windows let steam escape evenly so the bottoms don't get soggy, and they give you glimpses of those strawberry jewels inside, which honestly makes people want to eat them even more. I've noticed that when people see the lattice, they slow down and actually savor the pie instead of just devouring it like a normal pastry.
The Temperature Game
These pies are honestly best served warm but not steaming hot, somewhere in that golden zone where the butter is still tender but the filling has set up enough to hold its shape. If you make them ahead, let them rest at room temperature for a couple hours and they're still wonderful, though there's something undeniably special about biting into one that's been cooling on the rack for exactly fifteen minutes. Some mornings I've reheated leftovers in a 300-degree oven for five minutes just to chase that fresh-from-the-oven magic again.
Variations and When to Try Them
Once you've made these with strawberries, the door opens to all sorts of possibilities that feel exciting rather than like you're abandoning the original. I've done mixed berry versions by swapping half the strawberries for blueberries or raspberries, and I've even tried a version with blackberries that tasted like late summer itself. The filling formula stays exactly the same, so you're really just discovering what tastes good to you.
- Mix and match berries based on what looks best at the market and trust your instincts about the combinations.
- Serve these alongside vanilla ice cream or a dollop of whipped cream and watch people's eyes light up like you've performed actual magic.
- Store any leftovers in an airtight container for up to three days, though honestly they rarely make it past the first evening.
 Save to Pinterest
 These hand pies taught me that sometimes the most memorable food moments aren't about impressing people, they're about creating something that tastes like it was made with care. Now whenever summer shows up with its strawberries and sunshine, I know exactly what I'm making.
Recipe FAQs
- → How do I make the dough flaky?
Use cold, cubed butter and avoid overmixing to create coarse crumbs before adding ice water gradually. Chilling the dough before rolling also helps maintain flakiness.
- → Can I substitute other berries for strawberries?
Absolutely. Blueberries or raspberries work well and can be mixed with strawberries for varied flavor and texture.
- → What is the purpose of the lattice top?
The lattice allows steam to escape while baking and adds an attractive, flaky finish to the hand pies.
- → How should the hand pies be served?
They can be eaten warm or at room temperature, and pair beautifully with whipped cream or vanilla ice cream for extra richness.
- → Is it necessary to use homemade dough?
Store-bought dough can be used to save time, though homemade dough offers a fresher taste and texture.