 Save to Pinterest
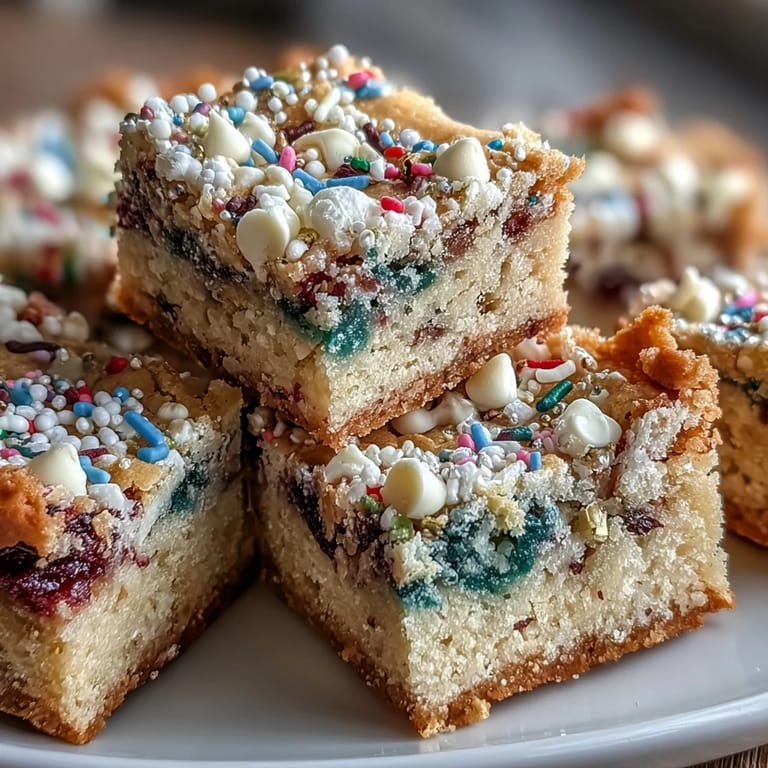
 My kitchen smells like butter and pure celebration when I make these bars, which happened almost by accident one March afternoon when I had sprinkles left over from my daughter's birthday party and absolutely nothing planned for St. Patrick's Day. I grabbed what I had on hand—white chocolate, rainbow sprinkles in every color imaginable—and threw together a simple buttery base. What came out of the oven was so vibrant and cheerful that it became our new tradition, the kind of dessert that makes people smile before they even taste it.
I brought these to a St. Patrick's Day potluck once and watched people reach for seconds before even trying anything else on the table—there's something about rainbow colors on a dessert that just works. One neighbor asked if they were complicated, and I got to share the secret that they're literally just a sheet pan bar, which somehow makes sharing them feel even better.
Ingredients
- All-purpose flour (2 cups): The foundation that keeps these bars tender without being cakey, and measuring by weight rather than scooping prevents the dense results I got my first attempt.
- Baking powder (1/2 teaspoon): Just enough lift to make the crumb delicate without compromising the chewy center.
- Salt (1/4 teaspoon): This small amount brings out the sweetness and makes the white chocolate taste richer than it actually is.
- Unsalted butter, melted and cooled (3/4 cup): Melting it first creates a more even crumb and skips the creaming step entirely, which is honestly why I make these so often.
- Granulated sugar (1 cup) and light brown sugar (1/2 cup, packed): The combination of both sugars gives depth—the granulated keeps them crisp at the edges while brown sugar keeps the interior soft and chewy.
- Eggs (2 large): These bind everything together and add richness, so room temperature eggs mix in more smoothly than cold ones straight from the fridge.
- Pure vanilla extract (2 teaspoons): Don't skip this or use imitation—it's the secret that makes people ask what makes these taste so good.
- White chocolate chips (3/4 cup): They melt slightly during baking and create little pockets of sweetness, though you can swap these for semisweet or milk chocolate if white chocolate isn't your thing.
- Rainbow sprinkles (1/2 cup, divided): Use about a third mixed into the batter for hidden pops of color and texture, and sprinkle the rest on top before baking so they soften slightly and stay vibrant.
Tired of Takeout? 🥡
Get 10 meals you can make faster than delivery arrives. Seriously.
One email. No spam. Unsubscribe anytime.
Instructions
- Set up your workspace:
- Preheat the oven to 350°F and line your 9x9-inch pan with parchment paper, letting the edges hang over the sides so you can lift the whole batch out once cooled. This takes 2 minutes and saves the frustration of trying to cut bars from a sticky pan.
- Whisk the dry team:
- In a medium bowl, combine flour, baking powder, and salt, stirring them together so the leavening distributes evenly throughout. Set this bowl aside and don't be tempted to skip this step—it ensures even baking.
- Create the wet base:
- Pour melted butter, granulated sugar, and brown sugar into a large bowl and whisk until the mixture is smooth and the sugar starts to dissolve slightly. Add your eggs one at a time, whisking fully after each addition, then add the vanilla and whisk until everything is combined and looks slightly pale.
- Fold it together gently:
- Using a spatula, gradually add the dry ingredients to the wet ingredients, folding rather than stirring so you don't overwork the batter. Stop as soon as no white streaks of flour remain—this is where the tender crumb comes from.
- Add your colors and crunch:
- Stir in the white chocolate chips and about a third of the rainbow sprinkles, folding just until they're distributed throughout the batter. The mixture will look festive and speckled, which is exactly right.
- Spread and top:
- Pour the batter into your prepared pan and use a spatula to spread it evenly into the corners, then scatter the remaining sprinkles over the top. The sprinkles on top will get slightly crispy while staying colorful, creating that visual magic.
- Bake until golden:
- Bake for 25 to 28 minutes, watching for golden edges and checking with a toothpick in the center—it should come out mostly clean with maybe a few moist crumbs clinging to it. If you overbake these, they become more cake-like and less chewy, so err on the side of underdone.
- Cool completely:
- Let the whole pan cool on a wire rack for at least an hour before lifting out and slicing. Rushing this step means your bars will crumble, so this is where patience actually pays off.
 Save to Pinterest
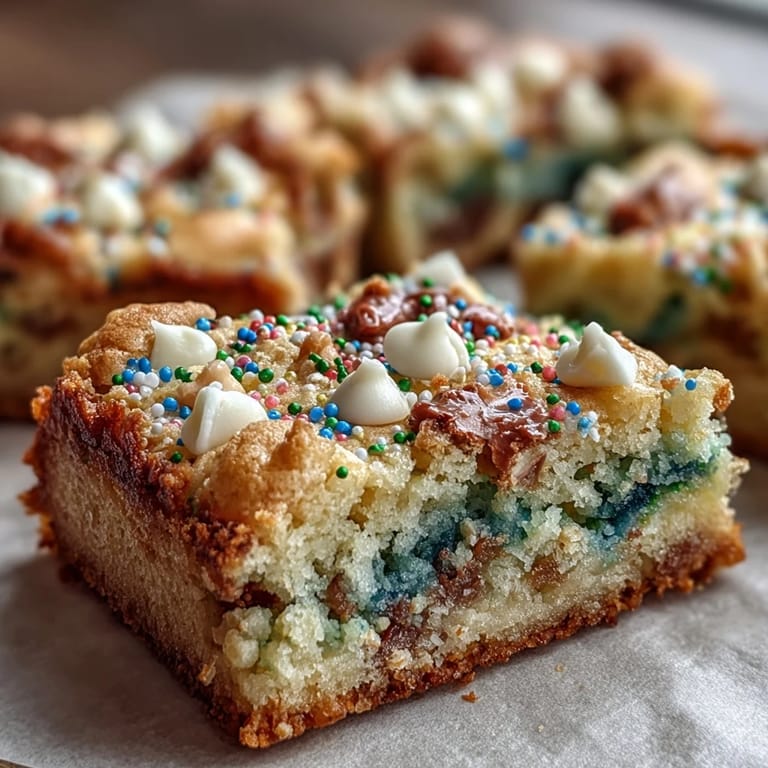
 These bars showed up to a St. Patrick's Day gathering at my office one year and somehow became the thing people remembered about that March—not the decorations or even the holiday itself, but the bright, buttery squares that made everyone feel a little bit lighter. That's when I realized desserts like this aren't really about the occasion; they're about the small joy of something homemade that doesn't pretend to be anything other than simple fun.
The Magic of Melted Butter
Using melted butter instead of softened butter changes the entire texture of these bars in ways that took me a few batches to understand. It creates a denser, more intentional crumb that's almost fudgy in the center while still staying light, and it eliminates the creaming step entirely, which means less cleanup and fewer dishes in the sink. The bars also bake more evenly because the melted butter distributes heat through the batter in a way that softened butter just doesn't, resulting in that perfect golden-edged, chewy-centered bite that keeps people coming back.
Why Two Sugars Matter
The first time I made these with only granulated sugar, they turned out crisp and almost shortbread-like, which is nice but not what I was chasing. Adding brown sugar changed everything because it brings molasses, which keeps the interior soft and chewy while the granulated sugar still gives you those slightly crispy edges. This balance is what makes these bars feel indulgent rather than just sweet—there's complexity in the texture that catches people off guard in the best way.
Storage, Variations, and Last-Minute Magic
These bars stay soft and delicious in an airtight container at room temperature for up to four days, and honestly they might taste even better on day two when the flavors have settled and the sprinkles have fully integrated. You can dress them up with a drizzle of melted white chocolate across the top or press small shamrock candies into the batter before baking if you're feeling extra festive. If you want to swap out the white chocolate, milk chocolate or semisweet work beautifully and give a different flavor profile entirely.
- For extra festivity, melt white chocolate and drizzle it across the cooled bars, letting it drip down the sides for a bakery-level finish.
- Store these in layers separated by parchment paper if you need them to last past day two, as this keeps them from sticking together.
- Make these a day ahead of a party and they'll actually be less fragile when you cut and serve them.
 Save to Pinterest
 These bars are the kind of recipe that makes me feel like I'm doing something special without actually having to work that hard, which is genuinely my favorite type of cooking. If you make them once, I'm guessing they'll become your go-to for any celebration that needs a little color and cheer.
Recipe FAQs
- → How do I achieve the colorful layers in the bars?
Incorporate rainbow sprinkles both inside the batter and on top before baking to create vibrant layers and texture.
- → Can I substitute the white chocolate chips?
Yes, semisweet or milk chocolate chips can be used as alternatives, adjusting sweetness and flavor accordingly.
- → What is the best way to store these bars?
Store in an airtight container at room temperature for up to four days to maintain freshness and texture.
- → How can I add extra festivity to these bars?
Try drizzling melted white chocolate or decorating with small shamrock candies for a festive touch.
- → What allergen information should I be aware of?
These bars contain wheat, eggs, and milk; check sprinkles and chocolate for soy or nut traces as well.