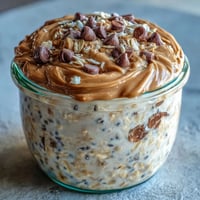
Save to Pinterest
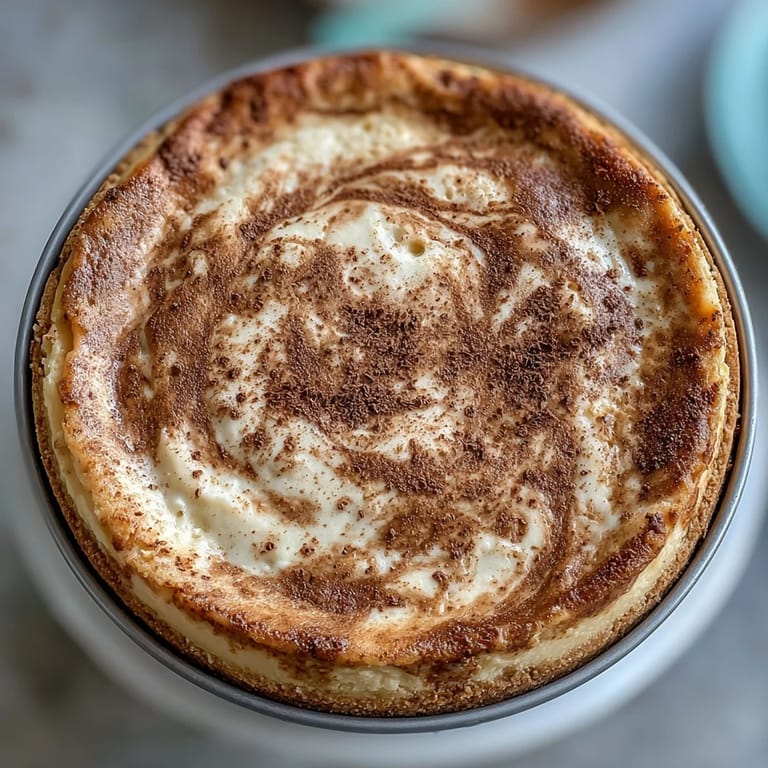
 I discovered hojicha cheesecake on a quiet afternoon in a small Tokyo café, where the pastry case gleamed with these elegant slices that looked almost too delicate to eat. The server described it with such reverence that I knew I had to recreate it at home, and what followed was a series of beautiful experiments in my kitchen—some yielding creamy perfection, others teaching me hard lessons about oven temperatures and patience. This version represents everything I learned, wrapped up in layers of buttery crust, silky cheesecake, and that unmistakable toasted tea elegance that keeps people coming back for another bite.
My neighbor stopped by one evening just as I was pulling a warm cheesecake from the oven, and the aroma of roasted tea mixed with vanilla made her pause in my kitchen doorway like she'd walked into something sacred. We ended up sitting on the counter at midnight with forks and two slices, talking about nothing important while this dessert slowly revealed how different each bite could taste depending on how much hojicha swirl you caught. That's when I realized this cheesecake was never just about technique—it was about creating a moment worth sharing.
Ingredients
- Graham cracker crumbs: The foundation that should be buttery and cohesive, so don't skimp on the melted butter or press too gently into the pan.
- Unsalted butter: Room temperature or melted works, but melted gives you better moisture and helps the crust hold together beautifully.
- Hojicha tea: Loose leaf is superior to bags because you get more aromatic oils and can control the steep, but bags work in a pinch—just be sure they're quality hojicha, not a blend.
- Heavy cream: Use the real thing here; it extracts hojicha's deep, slightly sweet notes in a way light cream cannot.
- Cream cheese: Must be softened to room temperature or your filling will have lumps that no amount of mixing can fix, and that's the voice of experience speaking.
- Eggs: Add them one at a time and beat well after each addition; this prevents overmixing while ensuring even distribution and a silky texture.
- Sour cream: Adds a subtle tang that balances the sweetness and makes the hojicha flavor pop—don't skip it.
Tired of Takeout? 🥡
Get 10 meals you can make faster than delivery arrives. Seriously.
One email. No spam. Unsubscribe anytime.
Instructions
- Heat your oven and prepare the pan:
- Preheat to 160°C (325°F)—lower than you'd think, but this protects the filling from cracking. Line your springform pan's bottom with parchment so the crust doesn't stick to the metal.
- Build the crust:
- Combine crumbs, melted butter, sugar, and salt in a bowl until it resembles wet sand, then press it firmly and evenly into the pan with your fingers or the bottom of a measuring cup. Bake for 10 minutes until lightly golden and fragrant, then let it cool completely—this matters more than you'd think.
- Steep the hojicha:
- Heat cream in a saucepan until wisps of steam rise from the surface, then add hojicha and cover immediately. Let it sit for exactly 10 minutes; any longer and it becomes bitter, any shorter and you won't capture that toasted, almost nutty depth. Strain through a fine sieve and cool to room temperature.
- Create the filling:
- Beat softened cream cheese for about 2 minutes until completely smooth with no lumps hiding in the corners. Add sugar and mix until you don't see grains anymore, then add eggs one at a time, beating gently after each—this is where patience matters.
- Finish the batter:
- Fold in sour cream, vanilla, and flour with a spatula using just a few strokes; overmixing develops gluten and makes the texture tough instead of creamy.
- Create the marbled effect:
- Pour most of the plain batter over the cooled crust, then drop spoonfuls of hojicha mixture across the top. Use a skewer or knife in slow, deliberate strokes to create gentle swirls—think of it like painting, not stirring.
- Bake with care:
- Place the springform pan on a baking tray and bake for 40 to 45 minutes until the edges look set but the very center still jiggles slightly when you gently shake the pan. The cheesecake continues cooking from residual heat, so underbaking is actually your friend here.
- Cool slowly and gently:
- Turn off the oven, crack the door open about 2 inches, and let the cheesecake sit inside for a full hour. This gradual temperature change prevents the dramatic cracking that happens when you move a hot cheesecake into cold air.
- Chill thoroughly:
- Cool to room temperature on the counter, then refrigerate for at least 5 hours, ideally overnight. This rest period is when the flavors meld and the texture sets to that perfect creamy-but-stable consistency.
 Save to Pinterest
 One winter morning, I woke to find my partner had taken a slice of this cheesecake straight from the fridge and left a note that simply said 'This is what comfort tastes like.' I understood then that certain desserts transcend their ingredients—they become memories in your mouth, moments you'll remember every time you taste roasted tea again.
Hojicha: The Roasted Wonder
Hojicha tea is different from green tea in ways that matter for this recipe; the roasting process removes bitterness and adds a toasted, almost grain-like flavor that plays beautifully against cream and sugar. When you first open a package of good hojicha, that warm, comforting aroma tells you immediately that this isn't going to taste like typical green tea desserts. The beauty of using it in a cheesecake is that the cold, creamy texture lets the hojicha flavor develop slowly on your palate instead of hitting you all at once.
The Science of Swirling
That marbled pattern isn't just pretty; it's a map of flavors showing you where concentrated hojicha mingles with plain cheesecake. The key is restraint—gentle swirls that don't overmix, because churning the two batters together turns your elegant marble into a uniform beige, and you lose that visual appeal entirely. I learned this after creating what I'll charitably call 'enthusiastically swirled' cheesecakes that still tasted wonderful but looked like I'd taken a blender to them.
Making It Your Own
This recipe is a foundation for your own creativity, and the beauty is how forgiving it becomes once you understand the basics. You can dust the finished cheesecake with hojicha powder for visual drama and an extra flavor boost, or top it with a thin layer of sweetened whipped cream that melts into the creamy filling. The recipe works equally well with digestive biscuits instead of graham crackers if that's what you have on hand, creating a slightly different but equally delicious texture.
- Try garnishing with a light dusting of hojicha powder and a few delicate candied tea leaves for a café-quality presentation.
- Make it a day ahead so the flavors settle and deepen overnight, which somehow makes everything taste more refined.
- Store covered in the refrigerator for up to three days, though it rarely lasts that long once people know it exists.
 Save to Pinterest
 This cheesecake arrives at tables wearing its hojicha sophistication like it was born elegant, but it's really just butter, cream, and patience working together. Every slice is a quiet reminder that the best desserts are often the ones that respect their ingredients and take their time.
Recipe FAQs
- → What is hojicha and how does it affect the flavor?
Hojicha is a Japanese roasted green tea that imparts a warm, toasty, and slightly caramel-like flavor, adding depth to the creamy filling.
- → Can I use a substitute for graham cracker crumbs?
Digestive biscuits are a great alternative, offering a similar texture and subtle sweetness for the crust.
- → How do I achieve the swirl effect?
After preparing the plain filling, mix a portion with hojicha cream and dollop it onto the base batter, then gently swirl with a skewer or knife.
- → What’s the best way to ensure the cheesecake texture is smooth?
Beat the cream cheese until smooth before adding other ingredients and avoid overmixing once eggs are incorporated for a creamy texture.
- → Why is it important to cool the cheesecake slowly in the oven?
Slow cooling prevents cracking and helps set the cheesecake evenly, preserving its creamy consistency.