 Save to Pinterest
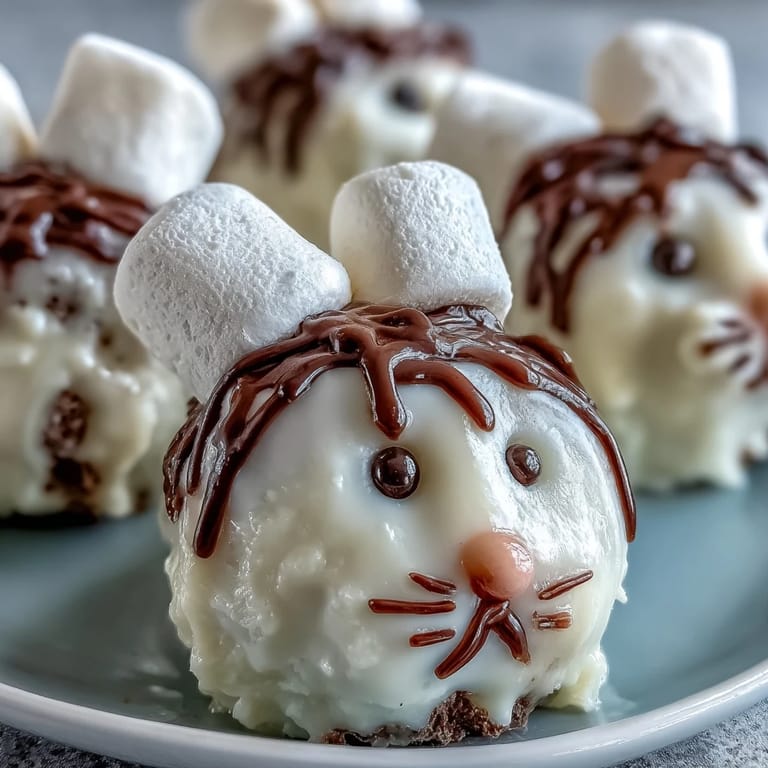
 My daughter came home from school with a flyer about the Easter party, and her eyes lit up when she saw the picture of chocolate-covered strawberry bunnies. She asked if we could make them together, and honestly, I was skeptical about my decorating abilities until I realized these little guys are forgiving and fun. The kitchen turned into a creative studio that afternoon, with her carefully placing marshmallow ears and declaring each strawberry had its own personality. Sometimes the best recipes are the ones that turn cooking into playtime.
Last Easter, I made a batch for my neighbor's potluck, and they disappeared in minutes. People kept asking how I'd made them, expecting some complicated technique, and I loved watching their faces when I explained it was basically strawberries, melted chocolate, and marshmallows. That's when I realized recipes don't need to be complicated to be memorable.
Ingredients
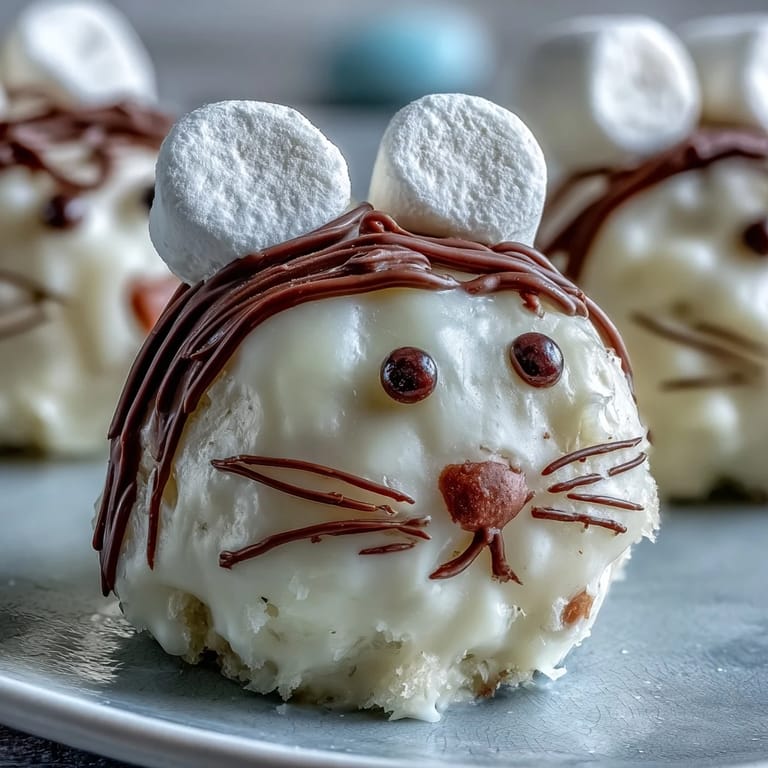
- 12 large fresh strawberries: Pick ones that are firm and uniform in size so they all dip evenly and look like a matching bunny family. The stems stay on as the bunny's tail, which is both practical and cute.
- 200 g white chocolate, chopped: Chop it small so it melts faster and more evenly. Quality matters here because cheap white chocolate can seize up and become grainy.
- 60 g dark chocolate, chopped: This is your drizzle and whisker chocolate, adding depth against all that sweetness. I use a ratio that lets the white chocolate be the star without overwhelming it.
- 24 mini marshmallows: These become the ears, so buy the smallest ones you can find. They soften as you work, which is actually helpful for shaping.
- Edible pink food gel or pink candy melts: A tiny touch goes a long way for the inner ears and noses. Gel is more forgiving than liquid food coloring, which can make things look sloppy.
- 24 candy eyes or mini chocolate chips: Candy eyes are easier and look more polished, but chocolate chips work just fine if that's what you have on hand.
Tired of Takeout? 🥡
Get 10 meals you can make faster than delivery arrives. Seriously.
One email. No spam. Unsubscribe anytime.
Instructions
- Get your station ready:
- Line a baking sheet with parchment paper and wash and completely dry your strawberries. Moisture is the enemy of chocolate coating, so don't skip the drying step or your chocolate will bead up instead of cling.
- Melt the white chocolate:
- Use a double boiler or microwave in 30-second bursts, stirring between each one until it's silky and smooth. The slow melting method keeps it from seizing, which is that grainy texture that ruins everything.
- Dip with confidence:
- Dunk each strawberry into the melted white chocolate, twisting gently so it coats evenly, then place it on your parchment sheet. Work quickly because the chocolate sets fast, and you'll need it soft enough to stick things to.
- Add those bunny ears:
- While the coating is still tacky, cut your mini marshmallows in half and press two halves into the top of each strawberry to create ears. The warmth of the chocolate helps them stick, but if they're sliding around, let the chocolate cool for a minute and try again.
- Paint on the pink details:
- Use a toothpick to dab a tiny bit of pink gel or melted pink candy into the center of each marshmallow ear and make a small nose dot. This step is where personality happens, so don't overthink it.
- Place the eyes:
- Add your candy eyes or chocolate chips to create a sweet bunny expression. They'll stick to the white chocolate easily, so take a second to position them where they feel right.
- Drizzle the dark chocolate:
- Melt your dark chocolate and either drizzle it with a fork or pipe it from a small bag to create whiskers and a mouth. This final touch brings the whole bunny to life.
- Let them set:
- Pop them in the refrigerator for 10 to 15 minutes until everything is firm. They'll keep for a few hours at room temperature if you're serving them soon.
 Save to Pinterest
 There's something magical about turning a simple strawberry into a little character. My daughter insisted we name each one, and she spent twenty minutes deciding if the one with the sideways whisker looked more like a rascal or a gentleman. Those small moments, where a recipe becomes a reason to slow down and play together, are why I keep making these every spring.
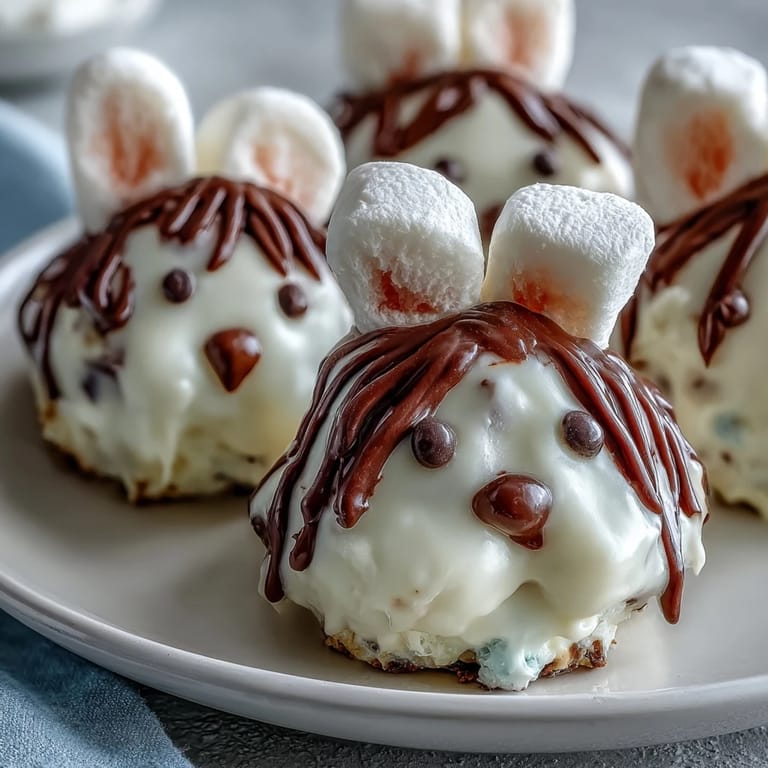
Customizing Your Bunnies
The beauty of this recipe is that there's room for your own style. Some people use chocolate chips instead of candy eyes and swear by it, while others paint on entire faces with melted chocolate. I've seen versions with pastel-colored chocolate instead of white, and honestly, they all look charming.
Timing and Storage Tips
Make these no more than a day ahead if you want them to look fresh and stay firm. If you're making them earlier, store them in an airtight container in the cool part of your fridge, and they'll hold up just fine. The strawberries themselves start to weep after about 24 hours, so timing matters if you want them looking perfect.
Making It Your Own
I've experimented with adding edible sprinkles, pearl dust, and even tiny fondant accessories to mine. The fun part is realizing there's no wrong way to decorate a strawberry bunny, which is exactly why kids love making them. Let the people you're cooking for add their own touches if they're willing, because that's where the real memory gets built.
- Edible gold or silver dust adds shimmer if you want them to feel extra fancy for a special event.
- Freeze them for up to two weeks before serving if you need to prep ahead for a big gathering.
- Room temperature tastes better than straight from the cold fridge, so pull them out about ten minutes before serving if you have the time.
 Save to Pinterest
 These little strawberry bunnies remind me that Easter isn't really about doing everything perfectly. It's about making something with your hands that brings a smile to someone's face, and these do that every single time. Whether they're wobbly or picture-perfect, they taste just as good.
Recipe FAQs
- → How do I melt white chocolate without burning it?
Use a double boiler or microwave in short 30-second intervals, stirring frequently until smooth to avoid overheating.
- → Can I substitute mini marshmallows for another decoration?
Yes, you can use colored sprinkles, edible pearls, or small fondant shapes for different decorative effects.
- → What’s the best way to attach the marshmallow ears securely?
Attach marshmallow halves while the chocolate coating is still soft to ensure they stick firmly before chilling.
- → How do I create the dark chocolate drizzle effect?
Melt dark chocolate and use a piping bag or a fork to drizzle lines over the coated strawberries for added detail.
- → Can this be made vegan-friendly?
Yes, substitute dairy-free chocolate and vegan marshmallows to accommodate vegan dietary needs.