 Save to Pinterest
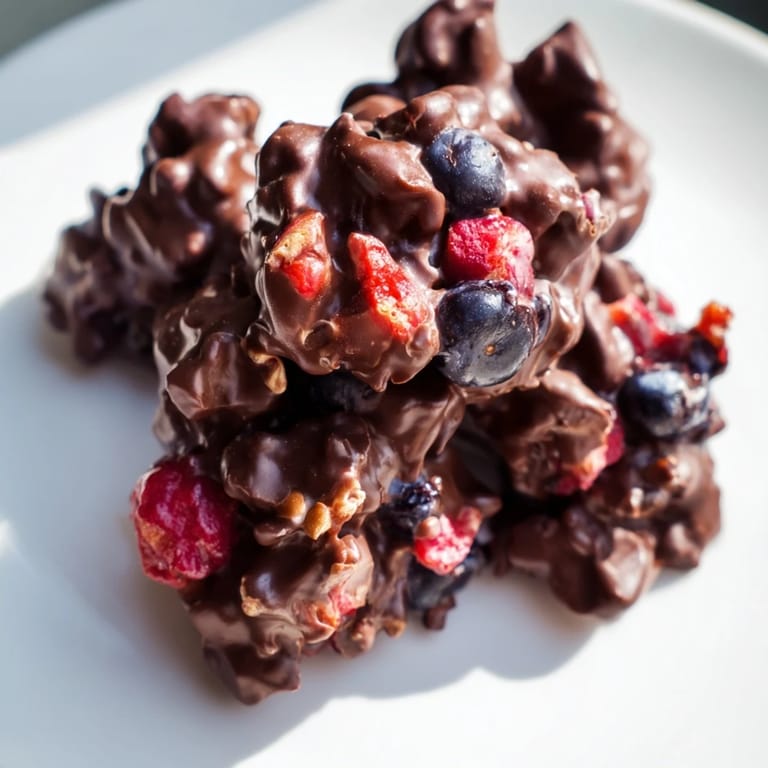
 Last summer, I was standing in my kitchen on one of those lazy afternoons when nothing sounded good to eat, and I found myself staring at a container of Greek yogurt and a handful of berries that were starting to look a little sad. Something clicked, and I thought, what if I made them into something frozen and chocolate-covered? The first batch came out of the freezer looking like tiny jewels, and I haven't stopped making them since.
I made these for a dinner party once, nestled them into little glasses with a drizzle of honey, and watched my guests' faces light up when they realized what they were eating. One friend said it was the best thing between a frozen yogurt shop and homemade dessert she'd ever had, and I've been riding that compliment ever since.
Ingredients
- Greek yogurt (1 cup plain or vanilla): The thicker, creamier the yogurt, the better your clusters hold together when frozen, so don't skimp on quality here.
- Honey or maple syrup (1 tablespoon): Just enough sweetness to balance the tartness of the yogurt without making it cloyingly sweet.
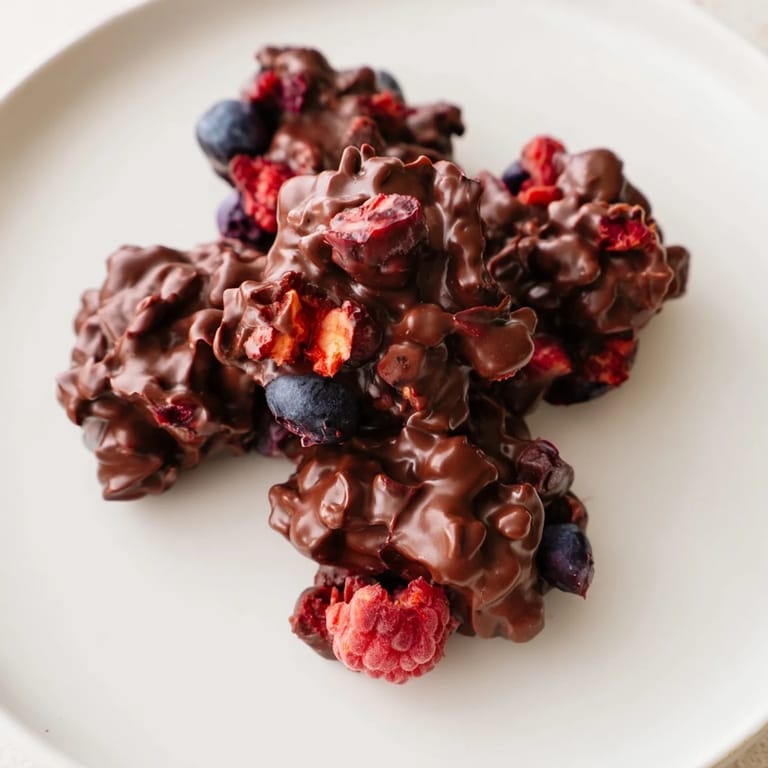
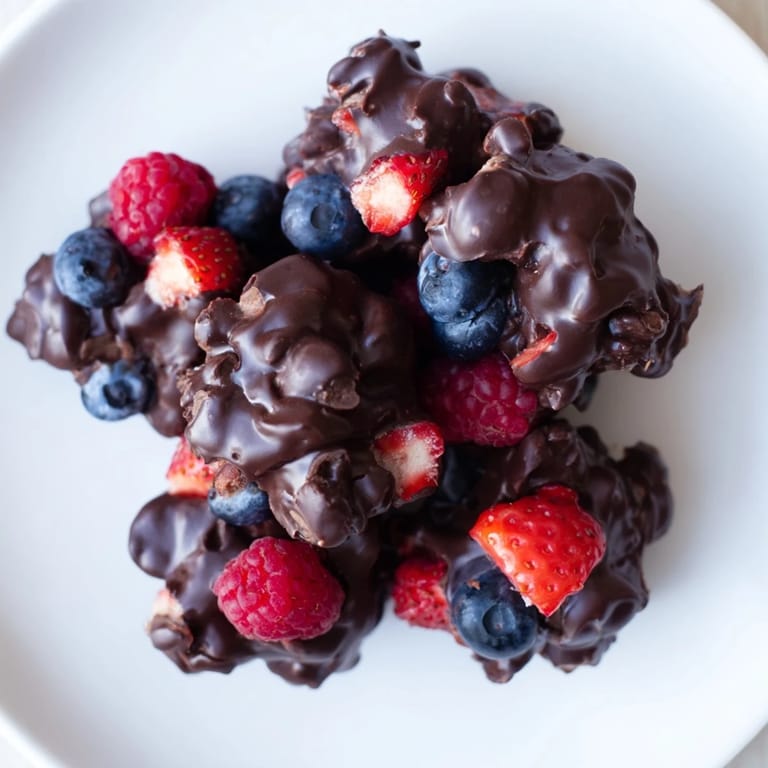
- Mixed fresh berries (1/2 cup, chopped): Blueberries stay firmer, raspberries add tartness, and strawberries bring brightness, so mix them however you love.
- Dark chocolate chips or chopped bar (1 1/4 cups): The quality matters here because it's the star of the show, so reach for chocolate you'd actually eat on its own.
- Coconut oil (1 tablespoon, optional): This trick makes the chocolate thin and glossy enough to coat smoothly without cracking when you freeze it.
Tired of Takeout? 🥡
Get 10 meals you can make faster than delivery arrives. Seriously.
One email. No spam. Unsubscribe anytime.
Instructions
- Set up your station:
- Line your baking sheet with parchment paper so nothing sticks, and make sure you have everything within arm's reach before you start.
- Mix the yogurt filling:
- In a bowl, stir the Greek yogurt with honey until it's smooth and creamy, then fold in the berries gently so they don't get crushed into the yogurt completely. You want little pockets of fruit throughout.
- Form the clusters:
- Using a heaping tablespoon or small ice cream scoop, drop mounds of the yogurt mixture onto your prepared sheet, spacing them about an inch apart so they don't freeze into one giant block.
- First freeze:
- Slide the sheet into the freezer and give it at least an hour to an hour and a half, until the clusters are solid all the way through and no longer jiggly.
- Melt the chocolate:
- While your clusters freeze, melt the dark chocolate and coconut oil together, either in the microwave in short 20-second bursts (stirring between each one) or over a gentle double boiler. Stop as soon as it's smooth and glossy.
- Coat each cluster:
- Working quickly so the frozen clusters don't thaw too much, dip each one into the warm chocolate using a fork, letting the excess drip off before setting it back on the sheet. It should be fully covered but not drippy.
- Final freeze:
- Return everything to the freezer for at least 15 minutes until the chocolate shell is completely set and crispy.
- Serve and store:
- These are best eaten straight from the freezer, when they're still frozen and crunchy, so keep leftovers in an airtight container in the freezer for whenever cravings hit.
 Save to Pinterest
 There's something magical about the moment you bite into one of these and hear that quiet crack of chocolate before the cool yogurt hits your tongue. It's the kind of snack that feels like you're getting away with something delicious.
Smart Flavor Swaps
Once you master the basic formula, you can play with it endlessly. I've made versions with chopped pistachios and dried cranberries, another with white chocolate and raspberry, and even a dark chocolate with toasted almond slivers that my partner keeps asking for. The beautiful thing is that the method stays exactly the same, so you're just playing with the filling and the coating.
The Freezer is Your Friend
These clusters keep in the freezer for up to two weeks, though they rarely last that long in my house. They're perfect for those moments when you want something sweet but don't want to commit to a full dessert, and they thaw just enough to soften slightly while still staying refreshingly cold. I've started keeping a stash at all times, almost like emergency dessert insurance.
Timing and Temperature Tips
The biggest variable in success is patience with the freezing, and making sure your chocolate coating is warm enough to coat smoothly but not so hot that it melts your frozen clusters. Once you've made these once or twice, you'll develop a feel for it, and the whole process becomes second nature.
- If you're in a hurry, you can speed up the initial freeze by using a shallower baking sheet or freezing in smaller clusters.
- Dip your fork in water between clusters to stop the chocolate from building up too thick on the tines.
- These taste even better the next day when the flavors have melded, so don't be shy about making them ahead for a party.
 Save to Pinterest
 These clusters are proof that the simplest recipes often become the ones you reach for most. Make a batch this week and see what I mean.
Recipe FAQs
- → What type of yogurt is best for these clusters?
Plain or vanilla Greek yogurt works best, offering creamy texture and tang that complements the dark chocolate and berries.
- → Can I use different fruits instead of berries?
Yes, chopped nuts, dried fruits, or mini chocolate chips can replace berries for varied flavors and textures.
- → How do I ensure the chocolate coating sets properly?
Freeze the clusters firmly before coating, dip quickly in smooth melted chocolate, then freeze again until the chocolate hardens.
- → Is it possible to make these clusters vegan?
Absolutely, by substituting plant-based yogurt and dairy-free chocolate, you can create vegan-friendly clusters.
- → What tools are needed for preparation?
A mixing bowl, spoon, baking sheet lined with parchment, microwave or double boiler for melting chocolate, and a fork for dipping are all you need.