 Save to Pinterest
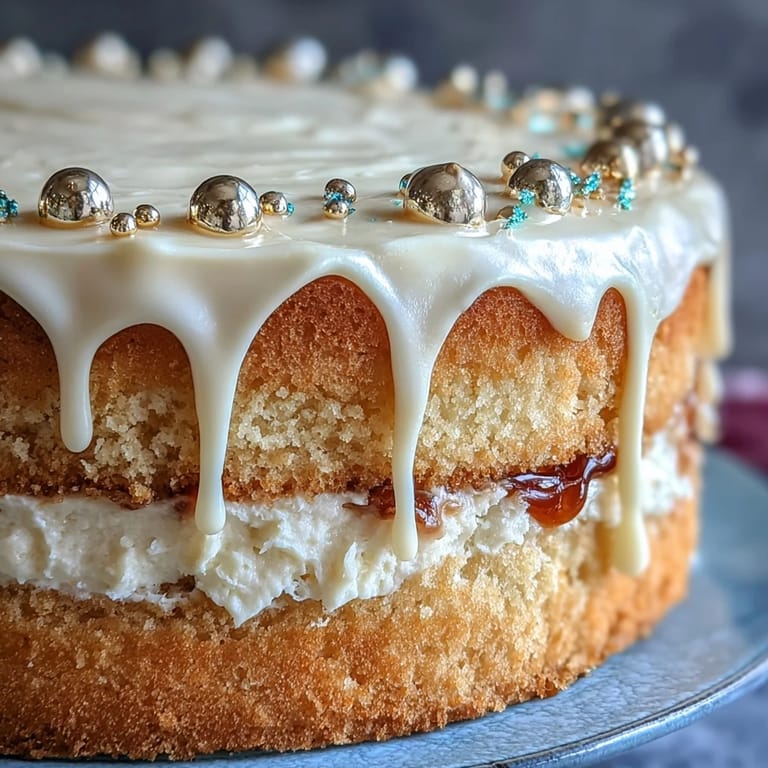
 The scent of white chocolate and vanilla filled my kitchen the first time I tackled this graduation cake, my timers competing with the rhythmic hum of the mixer. I wasn’t after perfection—just plenty of wow factor and a splash of gold for a milestone worth celebrating. Blending American flair with European elegance felt right for a cake that was both a little extra and playfully festive. I found myself grinning as I painted gold on crispy pearls, the edible balloons glimmering like confetti. It’s a recipe that brings out your joyful side, especially when you’re running on excitement and anticipation.
I made this cake for my cousin’s graduation party, and the moment she saw those gilded balloons atop the cake, she burst out laughing and hugged me hard. Baking felt less like work and more like orchestrating a sweet surprise. We ended up discussing measurement conversions as I smoothed the buttercream, her friends peeking in to steal crispy pearls. When we cut into the cake, sparkles and cheers followed—sometimes desserts just shift the mood of the whole room. That day, cake was celebration itself.
Ingredients
- All-purpose flour: Sifting the flour first makes the sponge airy and avoids dense pockets.
- Baking powder: Be sure it’s fresh—old baking powder leaves cakes flat and sad.
- Salt: A pinch balances sweetness and brings the vanilla forward.
- Unsalted butter: Room temperature butter creams perfectly; don’t rush with cold sticks.
- Granulated sugar: Creamed until pale, it gives the sponge its fine crumb and flavor.
- Eggs: Room temperature eggs make the batter blend smoothly without splitting.
- Vanilla extract: Look for pure extract or add paste for extra aroma—don’t skimp.
- Whole milk: Adds richness; using low-fat can dry out the cake.
- Powdered sugar: Sifted to avoid lumps in the buttercream.
- White chocolate: Always melt gently and let it cool—hot chocolate will curdle your buttercream.
- Heavy cream: Adjust to get the buttercream silky and the drip glossy.
- Edible gold spray or luster powder: Makes the balloon decorations shine, and it’s easier to use than you’d expect.
- White chocolate crispy pearls (or malt balls): Add crunch and serve as festive balloon toppers.
- Toothpicks or cake wires: You’ll need these to anchor those balloons atop the cake.
Tired of Takeout? 🥡
Get 10 meals you can make faster than delivery arrives. Seriously.
One email. No spam. Unsubscribe anytime.
Instructions
- Preheat and Prepare:
- Set your oven to 350°F and line three cake pans with parchment—greasing for insurance. You’ll feel organized stacking everything in reach.
- Mix Dry Ingredients:
- Whisk flour, baking powder, and salt in a bowl until well blended, then set aside—the kitchen always smells clean at this point.
- Cream Butter and Sugar:
- Beat butter and sugar until fluffy and pale, listening for the clattering beat; scrape the bowl and add eggs one by one, finishing with vanilla.
- Combine Wet and Dry:
- Alternate adding flour mix and milk, starting and ending with flour—go gentle, mix just until combined.
- Divide and Bake:
- Evenly portion batter among pans, smooth the tops, and bake until a toothpick comes out clean, about 30–35 minutes—the kitchen fills with anticipation.
- Cool and Level:
- Rest cakes for 10 minutes, then invert to racks to cool completely; slice off domes if you want flat layers.
- Make Buttercream:
- Beat butter silky smooth, gradually add powdered sugar, then pour in cooled melted white chocolate, vanilla, salt, and cream as needed.
- Layer and Crumb Coat:
- Spread buttercream between layers, stack carefully, then apply a thin coat to catch crumbs; chill for 30 minutes—it’s messy but rewarding.
- Final Buttercream:
- Cover chilled cake with a generous buttercream layer, smoothing sides and top patiently.
- White Chocolate Drip:
- Heat cream to a simmer, pour over chopped white chocolate, wait a minute, then stir until completely smooth; let it cool so it drips but doesn’t run.
- Add the Drip:
- Using a spoon or squeeze bottle, drip ganache around the top edge to cascade; fill the center and smooth for drama.
- Gold Balloon Decorations:
- Spray crispy pearls or malt balls with gold, let dry, insert toothpicks, then cluster atop the cake—it’s fun and easier than it looks.
- Chill and Serve:
- Keep cake chilled until ready, but bring to room temperature before slicing for the softest crumb.
 Save to Pinterest
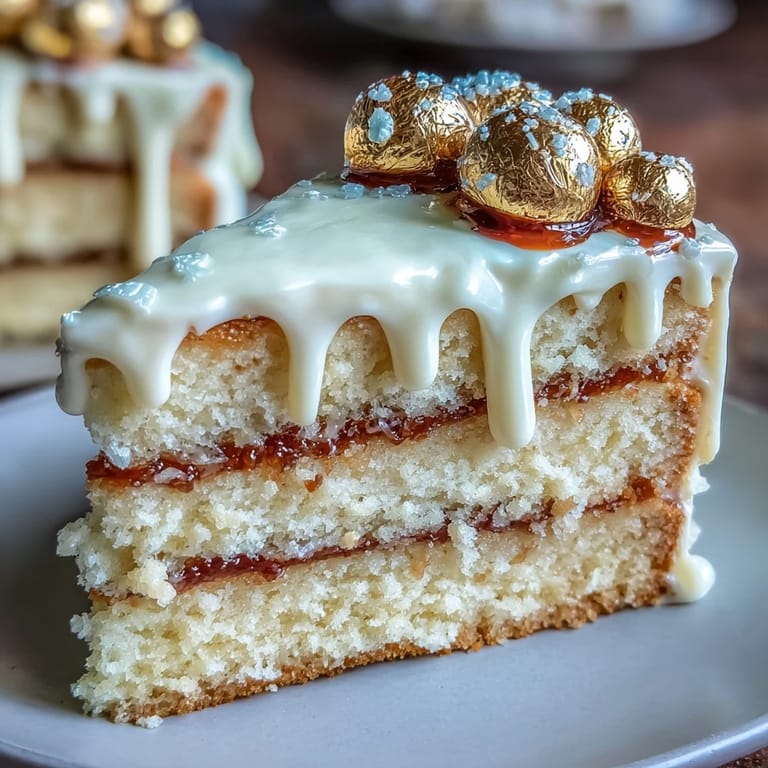
 When I sliced this cake after the graduation speech, people paused mid-conversation, forks ready, eyes on the dramatic white chocolate drip and golden balloons. It felt like the cake had its own applause—sometimes food helps anchor a memory, and this one sparkled among achievements. The laughter as we tried to keep the gold dust off our clothes made it unforgettable.
Celebratory Cake Touches That Make a Difference
Decorating with edible gold can feel intimidating, but a soft pastry brush and patience bring results. I always lay newspaper out to catch overspray and keep the kitchen sparkling, not gilded. Clustering the gold balloons is like styling a bouquet—play with height for the best effect. It transforms a cake into centerpiece status, and everyone feels special when you slice into it.
How to Achieve a Dramatic White Chocolate Drip
White chocolate is fussier than dark, so I stir the ganache until glossed and test a drip on the side before committing. If it runs too fast, I chill the ganache for a few extra minutes and try again. Using a squeeze bottle gives you control, but a spoon works too—just let gravity do the magic. Cascade drips at different lengths for a playful look.
Bringing It All Together for Graduation
The moment the cake goes on the table, all eyes go to the gold balloons; I always check they’re anchored so nobody gets a surprise bounce. Slicing is easiest with a warmed knife and steady hands, and leftover slices taste even better the next day. Sharing this cake marks more than a milestone—it’s a delicious sendoff with flair.
- Have your tools cleaned and ready before starting the drip.
- Chill the cake well before adding decorations for stability.
- Let the buttercream come to room temperature before serving for the best flavor.
 Save to Pinterest
 May your cake sparkle as bright as the graduate–here’s to milestone moments and sweet memories! Don’t be afraid to get creative with gold accents–it’s worth the extra shimmer.
Recipe FAQs
- → How do I achieve a smooth white chocolate drip?
To create a smooth drip, heat cream just until simmering and pour over finely chopped white chocolate. Let it rest, then stir gently until glossy and fully melted. Cool before applying to prevent runny drips.
- → What makes the gold balloon decoration safe for eating?
The gold balloons use edible gold spray or luster powder on chocolate crispy pearls or malt balls. Always use food-safe sprays and powders for decorations.
- → Can I substitute ingredients for dietary needs?
Yes, you can replace butter and milk with plant-based alternatives for a dairy-free version, and choose gluten-free flour for sensitivities. Check ingredient labels for allergens.
- → How should I store the cake?
Keep the cake refrigerated for up to 3 days. Bring to room temperature before serving to restore texture and flavor.
- → What tools help in assembling and decorating?
Use an electric mixer for batter and buttercream, offset spatula for smooth coating, squeeze bottle or spoon for drip, and wire racks for cooling. Toothpicks or cake wires create the balloon cluster effect.
- → How can I enhance the vanilla flavor?
Adding vanilla bean paste to the sponge batter gives a more pronounced aroma and richer flavor. Use in place of or alongside vanilla extract.