 Save to Pinterest
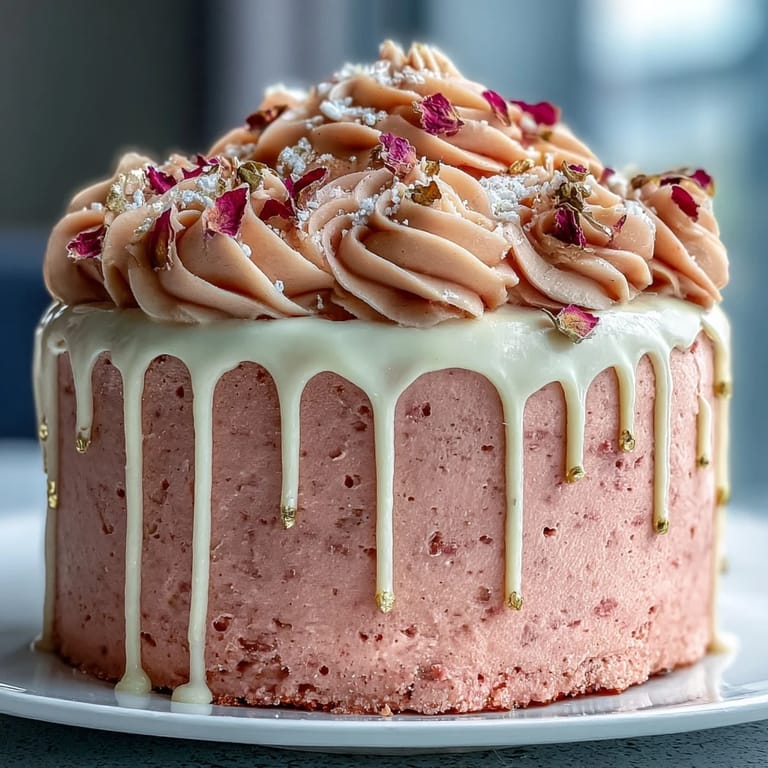
 Some desserts have a way of making the kitchen feel like a scene from a movie set. I recall the first time this Rosé Velvet Cake shimmered on my countertop, sunlight catching the pink tones and golden drips—I half expected a round of applause from the cutlery. The aroma was like a promise: delicate wine intermingling with chocolate, making the whole house lean in. Decorating that first cake, I was covered in a constellation of edible gold and giggling at how fancy my hands looked. If you're in search of that rare blend of celebration and surprise, this cake brings it to the table.
I made this cake on a Saturday afternoon while a playlist of Motown classics played in the background, prepping for my cousin's bridal shower. There was a moment, between sifting flour and whisking eggs, when laughter spilled from the living room into the kitchen and I realized I was grinning at the beat of my own wooden spoon. Each layer came out perfectly pink, and the anticipation built as we waited to unveil it to everyone gathered in the backyard.
Ingredients
- All-purpose flour: Sifting it with the other dry ingredients makes the layers tender—learned that skipping this step leads to heavy crumb.
- Granulated sugar: The right amount adds sweetness and helps the cake brown beautifully.
- Baking soda: It encourages a gentle rise, balancing acidity from the buttermilk and vinegar.
- Fine salt: Just a touch sharpens the flavors without leaving any aftertaste.
- Unsweetened cocoa powder: Even a tablespoon deepens the color and adds a subtle richness.
- Vegetable oil: Keeps the cake moist for days—my trick for sliceable leftovers.
- Eggs, room temperature: Blending them in when they're not cold ensures the batter is smooth.
- Buttermilk, room temperature: The acidity helps produce that delicate crumb and a slight tang.
- Rosé wine: Dry or sparkling rosé subtly perfumes the cake without overpowering it.
- Vanilla extract: Adds warmth and rounds out the wine's floral notes.
- White vinegar: A classic velvet-cake addition, it reacts with the baking soda for a soft texture.
- Pink or rose gel food coloring: A dab goes a long way, so ease in until you reach the exact blush you love.
- Unsalted butter, room temperature: Essential for a fluffy buttercream—cold butter will not blend properly.
- Powdered sugar, sifted: Sifting prevents lumpy frosting, a lesson learned after my first attempt at homemade icing.
- Additional rosé wine (for buttercream): Adjusts both flavor and consistency—add gradually.
- Heavy cream: Melts with white chocolate to create a drip that pours smoothly down the cake sides.
- White chocolate chips: Choose high quality for a glossy, luscious drip.
- Edible gold luster dust: The secret to making your cake glint like fine jewelry—don't be shy with the brush.
- Vodka or clear lemon extract: Mixes with luster dust for paintable gold without leaving an aftertaste.
Tired of Takeout? 🥡
Get 10 meals you can make faster than delivery arrives. Seriously.
One email. No spam. Unsubscribe anytime.
Instructions
- Prep the pans and oven:
- Set your oven to 350°F and line three 8-inch pans with parchment—there's something satisfying about perfect circles of paper fitting neatly into place.
- Sift the dry ingredients:
- Combining flour, sugar, baking soda, salt, and cocoa in a large bowl, you'll notice how gently the cocoa darkens the mix.
- Whisk wet ingredients:
- In a separate bowl, whisk oil, eggs, buttermilk, rosé, vanilla, and vinegar until silky and completely blended.
- Combine wet and dry:
- Add the wet mixture to the dry and stir just until no streaks remain; swirl in pink food coloring little by little, tasting with your eyes.
- Divide and bake:
- Pour the batter evenly into the pans and bake for 30-35 minutes, checking with a toothpick for doneness—a clean pick signals they're ready.
- Cool the cakes:
- Allow cakes to cool 10 minutes in the pans, then flip onto a rack—the scent is marvelous, and the cakes firm up as they cool.
- Make the rosé buttercream:
- Beat room-temp butter until it's cloud-light, adding powdered sugar gradually so nothing puffs up in your face.
- Finish the buttercream:
- Add in rosé, vanilla, salt and beat until the frosting is pillowy, adjusting consistency with more wine if needed.
- Assemble and crumb coat:
- Level the cakes and layer them with buttercream, applying a thin outer coat to trap crumbs—chill briefly for smooth decorating later.
- Apply final buttercream layer:
- Spread the last, generous layer of frosting all around; smooth with an offset spatula for that 'pro bakery' finish.
- Prepare the gold drip:
- Melt white chocolate chips with cream and cool slightly; the glossy mixture is just waiting to cascade over your cake.
- Gold painting:
- Stir gold luster dust with vodka or lemon extract to create a shiny paint, then carefully brush onto the drips once set.
- Decorate:
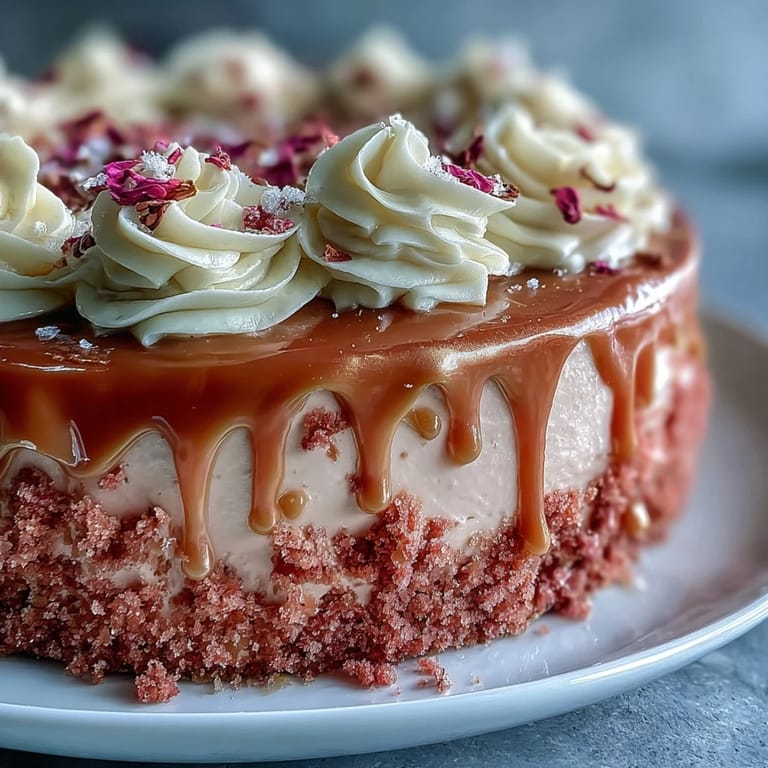
- Add edible gold flakes, rose petals, or berries if you want—stand back and admire the artistry before the first slice.
 Save to Pinterest
 Watching my best friend’s eyes widen as the gold-dripped cake made its entrance, I realized it's not just a recipe—it's a cause for a little gasp and a lot of celebration. It’s now become my go-to for marking a moment that deserves a bit of sparkle and a happy memory baked right in.
Choosing Your Rosé and Why It Matters
I've tried both still and sparkling rosé in this cake, and the real difference is in subtlety—sparkling versions bring a brighter freshness, while still wines lend a slightly more floral complexity. Pick a bottle you’d actually enjoy sipping, because the flavor lingers in every bite.
Making the Gold Drip Extra Shimmery
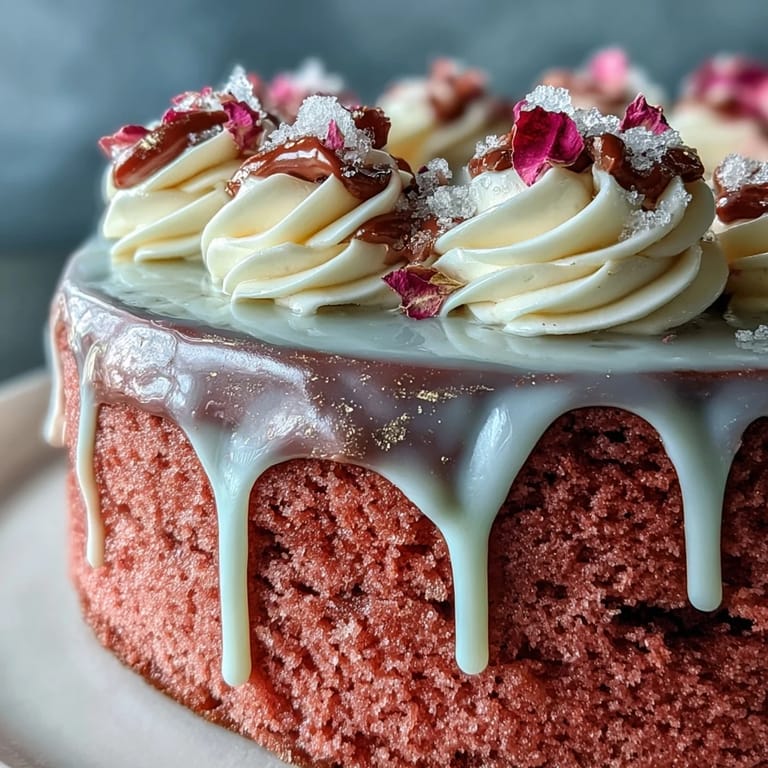
Mixing the gold luster dust with vodka instead of lemon extract left less streaking for me—it dries faster, so the shine stays put. The first time I attempted the gold drip, I was too timid with color but soon learned that a little confidence with the brush delivers a beautifully bold effect.
Decorating and Serving Tricks
I used an offset spatula and a turntable to get smooth edges, rotating gently while keeping my hand steady—each stroke reminded me of painting rather than baking. Keeping berries and petals to just a few clusters makes each accent stand out without blocking that gorgeous drip.
- Chill the cake before pouring on the gold drip for tidy, dramatic runs down the sides.
- Edible flowers can add a pop of romance—just double-check they’re safe to eat.
- Let the cake come to room temp before serving for the fluffiest crumb and richest flavor.
 Save to Pinterest
 Cakes like this aren’t just for showers—they make any gathering memorably special and a little bit sparkly. Enjoy creating a slice of magic in your own kitchen.
Recipe FAQs
- → Can I use sparkling rosé?
Yes—both dry and lightly sparkling rosés add bright, floral fruit notes. If the wine is very effervescent or thin, reduce other liquid slightly; taste the buttercream as you add wine to balance sweetness and texture.
- → How do I keep the buttercream from becoming too soft?
Use room-temperature butter but chill the assembled layers briefly between steps. Beat until light, then refrigerate the crumb-coated cake for 15–30 minutes before the final layer to firm the surface and make smoothing easier.
- → What’s the best technique for a smooth gold drip?
Cool the white-chocolate drip until just pourable, then apply with a spoon or squeeze bottle for controlled drips. Once set, mix edible gold luster with a small amount of vodka or clear extract and brush onto the drips for an even metallic sheen.
- → Can I omit alcohol and keep the flavor?
Yes—substitute rosé with concentrated grape juice, verjus, or strong hibiscus tea to retain a floral-fruit note. For the gold paint, use clear lemon extract instead of vodka for food-safe dilution.
- → How can I ensure even, level cake layers?
Weigh the batter and divide equally among pans, rotate pans in the oven if needed, and trim domed tops with a serrated knife or leveler once cooled. Chilling layers briefly makes trimming and stacking cleaner.
- → What are the best storage and make-ahead options?
Fully assembled, covered cake keeps in the refrigerator for up to 24 hours—bring to room temperature before serving. Layers can be baked a day ahead or frozen wrapped; finish with buttercream and the gold drip the day of service for peak appearance.