 Save to Pinterest
 There's something magical about baking when someone's achievement deserves celebration, and these cookie bars emerged from exactly that impulse. My cousin called me the morning after her graduation, already panicking about what to bring to her party that afternoon, and I remembered how she'd always stolen bites of cookie dough when we were kids. These bars came together so naturally—chewy, packed with chocolate, and dressed up enough to feel special without requiring any real skill. They've become my go-to for marking those moments when life shifts, when someone crosses a finish line worth remembering.
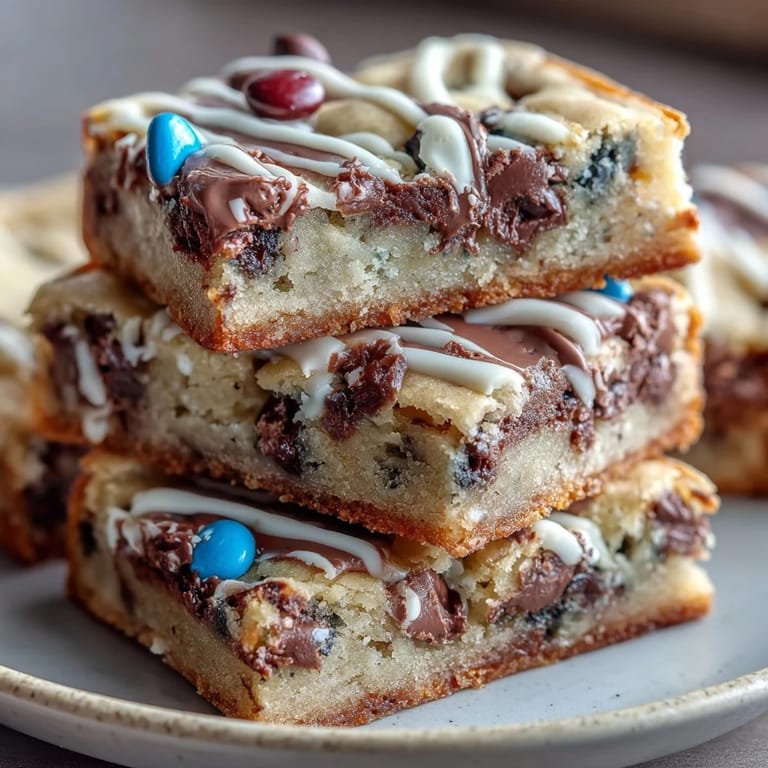
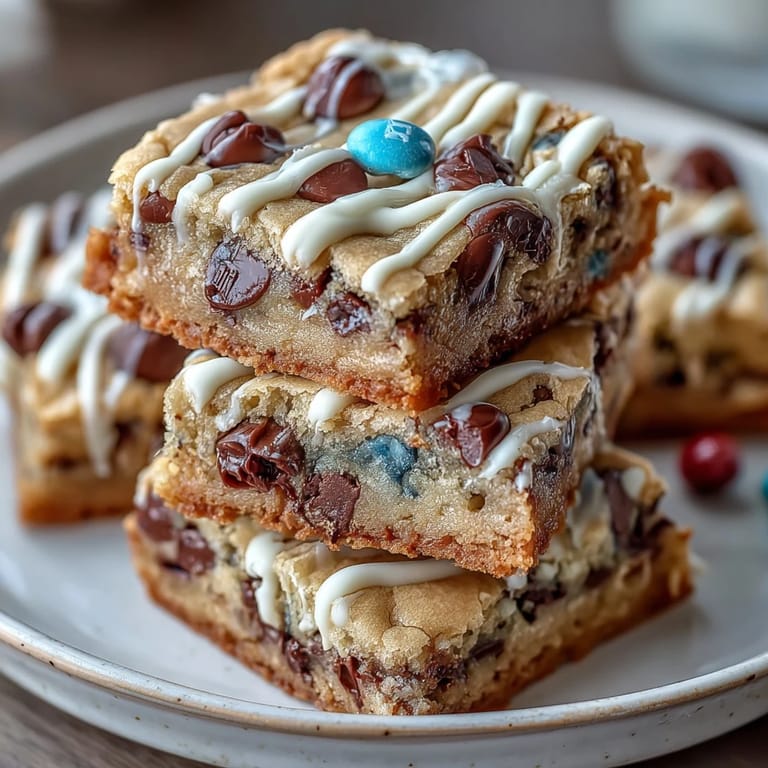
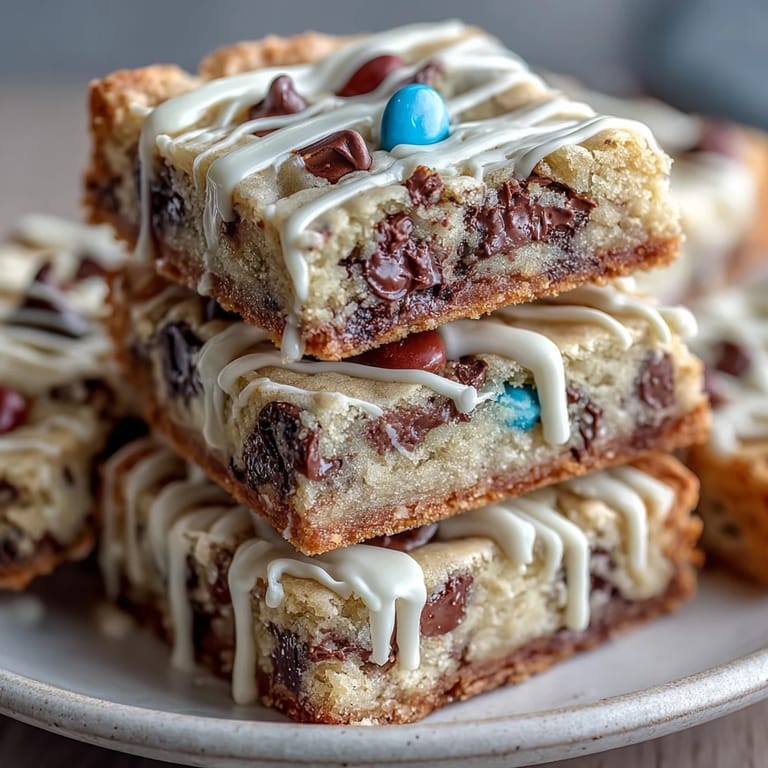
I watched my friend's face light up when she saw these bars arranged on a platter with her school colors mixed into the candies—navy and gold scattered across the golden-brown surface. She didn't take a single one herself for hours because she kept showing them to people, proud that someone had made something just for her moment. That's when I realized these bars aren't really about the chocolate or the technique; they're about showing up for someone with something sweet in your hands.
Ingredients
- All-purpose flour (2 1/4 cups): The foundation that keeps everything tender; don't sift unless you love a denser bar.
- Baking soda (1 tsp): This does the heavy lifting for spread and chew, so measure carefully or your bars might stay too thick.
- Salt (1/2 tsp): Sounds small but it's the secret that makes every other flavor sing without tasting salty itself.
- Unsalted butter, melted (1 cup): Cooling it slightly keeps the eggs from scrambling when you add them; I learned this the messy way.
- Brown sugar (1 cup packed) and granulated sugar (1/2 cup): The combo gives you that chewy depth you can't fake with just one type.
- Eggs (2 large) and vanilla extract (2 tsp): These bind everything and add richness without making the bars feel heavy.
- Semi-sweet chocolate chips (1 cup): The classic choice, but milk chocolate works if you want something sweeter and less intense.
- Colored candy-coated chocolates (1/2 cup): This is where the celebration lives; they add crunch and color without melting into the dough.
- White chocolate (4 oz) and vegetable oil (1 tsp): The oil prevents the chocolate from seizing and makes drizzling smooth and forgiving.
Tired of Takeout? 🥡
Get 10 meals you can make faster than delivery arrives. Seriously.
One email. No spam. Unsubscribe anytime.
Instructions
- Prepare your stage:
- Preheat your oven to 350°F and line a 9x13-inch pan with parchment paper, letting it hang over the edges so you can lift everything out later without wrestling with the pan. This simple step saves you from burnt edges and frustrated fingers.
- Combine the dry goods:
- In a medium bowl, whisk together flour, baking soda, and salt until there are no streaks of anything darker, setting this mixture aside like you're staging a play. This keeps your final dough from developing toughness through overmixing.
- Build the wet base:
- In a large bowl, whisk the cooled melted butter with both sugars until smooth and slightly lighter than it was, then add your eggs and vanilla one at a time, mixing until everything looks combined. You'll notice the mixture becomes more voluminous and pale; this is exactly what you want.
- Marry wet and dry:
- Gently fold the dry ingredients into the wet mixture using a spatula, stopping as soon as you don't see streaks of flour anymore. Overmixing here turns tender bars into something tougher, so resist the urge to blend it into complete smoothness.
- Add the celebration:
- Stir in the chocolate chips and colored candies with a few gentle strokes, keeping everything distributed but still tender. The dough should look studded and ready, not overworked.
- Spread and bake:
- Press the dough evenly into your prepared pan and slide it into the oven for 23 to 25 minutes, until the edges are golden and a toothpick inserted in the center comes out with just a few moist crumbs clinging to it. You want chewy bars, not cake, so don't wait for a completely clean toothpick.
- Cool with patience:
- Let the bars cool completely in the pan on a wire rack before touching them; rushing this step makes them crumbly and fragile. A full cool is worth the wait.
- Create the drizzle magic:
- Melt your white chocolate with vegetable oil in 20-second microwave bursts, stirring between each one until smooth and pourable. The oil keeps it glossy and prevents it from seizing into something grainy.
- Dress them up:
- Drizzle the white chocolate over the cooled bars using a spoon or piping bag, then add sprinkles or additional candies while the chocolate is still wet so they stick. Let the drizzle set completely before cutting.
- Cut and serve:
- Lift the bars out using the parchment overhang and cut them into 16 squares on a clean surface. They look more professional when cut cleanly with a sharp knife wiped between cuts.
 Save to Pinterest
 Years later, I ran into my cousin at the grocery store and she mentioned making these bars for her own celebration, using her new school's colors this time. She said they'd become her shorthand for marking good things, the recipe she reaches for when she wants something that tastes like someone cared enough to show up. That might be the best compliment a recipe can get.
Customizing Your Colors
The beauty of these bars is how they bend to your vision without requiring you to change a single ingredient ratio. I've made them with deep red and silver candies for a wedding shower, soft pastels for a baby celebration, and rainbow chaos for a pride party where the point was joy in every color at once. The base recipe stays rock solid; only the celebration changes.
Storage and Make-Ahead Magic
These bars keep beautifully in an airtight container at room temperature for up to four days, which means you can make them a day ahead and skip the last-minute rush. I once made them three days early because life got chaotic, and honestly they tasted even better as the flavors settled and deepened together. You can also freeze them unfrosted for up to a month, then thaw and drizzle them whenever the celebration calls.
The Secret to Perfect Texture
The difference between bars that shatter and bars that bend comes down to understanding what each ingredient does and respecting it. Too much flour and they're cake; too little and they spread thin and burn. The melted butter gives them richness without whipping in air, and the ratio of brown to white sugar keeps them fudgy without being dense.
- If your bars spread too thin, your baking soda might be old; fresh baking soda spreads less aggressively.
- If they feel cakey, you might have compacted the flour when measuring; spoon and level instead of scooping.
- Room temperature eggs mix in more smoothly than cold ones straight from the fridge.
 Save to Pinterest
 These bars are really just an excuse to gather, to mark moments, to tell someone they matter. Bake them when you have something to celebrate, even if it's just surviving another week.
Recipe FAQs
- → What ingredients give these bars their chewy texture?
The combination of melted butter and both brown and granulated sugars creates a moist, chewy texture in the bars.
- → Can I substitute the candy-coated chocolates with other mix-ins?
Yes, you can use dark or milk chocolate chips, nuts, or other colorful candies to customize the bars to your liking.
- → How do I achieve a smooth white chocolate drizzle?
Melt white chocolate with a small amount of vegetable oil in short microwave bursts, stirring frequently until smooth before drizzling.
- → What is the best way to ensure even baking of the bars?
Use a parchment-lined 9x13-inch pan for even heat distribution and bake until edges are lightly golden and a toothpick comes out mostly clean.
- → How should the bars be stored for freshness?
Store them in an airtight container at room temperature for up to four days to maintain softness and flavor.