 Save to Pinterest
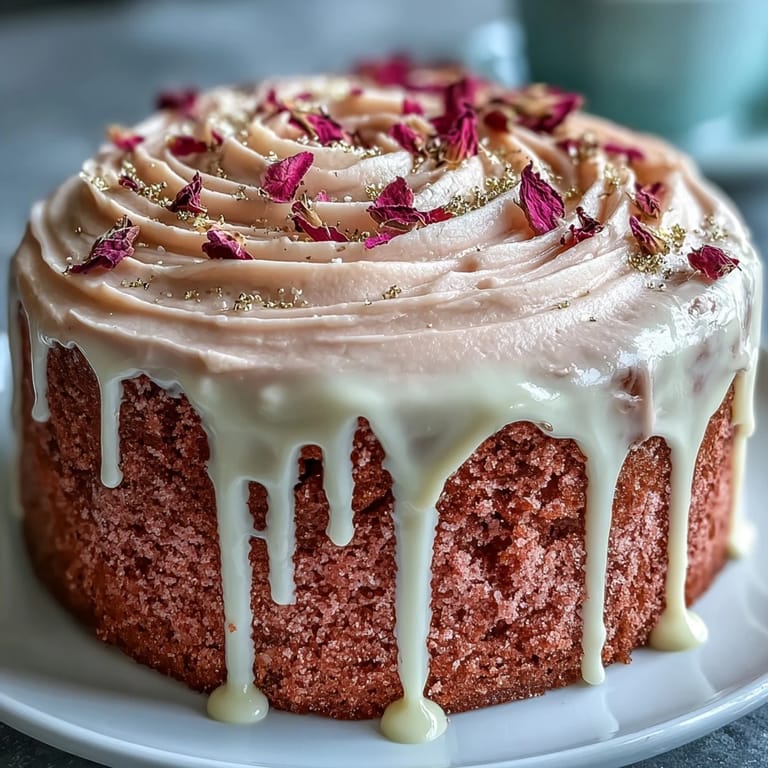
 There was a morning recently when my kitchen turned blissfully pink for a soon-to-be bride's surprise celebration. The sound of whisking was drowned by laughter drifting in from the living room, while streaks of food coloring swirled through the batter like watercolor roses. I discovered how a splash of rosé in the cake transforms the crumb into something unexpectedly complex and celebratory—a far cry from your everyday velvet cake. The true satisfaction came when the gold drip, painted on with trembling hands, finally looked regal instead of chaotic. This recipe became a conversation piece as much as it was dessert.
The last time I baked this for a friend’s bridal brunch, we ended up having an impromptu frosting-tasting session—everyone sneaking fingerfuls while debating the best playlist for the occasion. The once-nervous bride declared it 'almost too pretty to cut,' but then dove in first anyway. Watching the slices, delicate pink against gleaming gold, being passed around the table, the cake seemed to set the mood for something truly special. Rosé velvet crumbs ended up scattered like confetti over the tablecloth, and not a single guest minded. That carefree spirit is now inseparable from this recipe for me.
Ingredients
- All-purpose flour: Sift for softness and an even, light crumb—don't skip this, it matters more than you’d think.
- Granulated sugar: The right sweetness emerges when creamed fully, so take your time here.
- Baking soda & baking powder: Both are essential for an airy rise and a little spring in each bite.
- Salt: Just a half teaspoon, but it keeps the cake from tasting flat—I've forgotten it once and regretted it.
- Unsweetened cocoa powder: Gives the cake its subtle depth, not a chocolate bomb but just enough richness.
- Unsalted butter: Room temp is non-negotiable, or the batter’s too lumpy.
- Buttermilk: Adds tenderness and that slight tang I look for in velvet-style cakes.
- Rosé wine: Choose something drinkable—a good rosé makes the cake scented and nuanced rather than artificial.
- Eggs: Room temperature means they blend in beautifully, so set them out early.
- Vanilla extract: Lends warmth and rounds out the flavor, never optional here.
- White vinegar: Tightens the crumb just a bit—trust it for structure.
- Pink food coloring gel: Gel works best for a saturated blush, and you control the shade with every swirl.
- Cream cheese (for frosting): Makes the frosting tangy, creamy, and easy to spread.
- Powdered sugar (for frosting): Sifted first to avoid stubborn lumps—learned the hard way.
- Edible gold luster dust & vodka (for painting): Finishes the cake with a statement—stir until you get a shiny, brushable paint.
Tired of Takeout? 🥡
Get 10 meals you can make faster than delivery arrives. Seriously.
One email. No spam. Unsubscribe anytime.
Instructions
- Prep the pans:
- Grease and line your three cake pans with parchment, getting into every corner to avoid sticking—there’s nothing more frustrating than unmolding a perfect crumb and leaving half behind.
- Mix dry ingredients:
- Sift flour, cocoa, baking soda, baking powder, and salt into a bowl; the cocoa’s aroma will be faint but unmistakable.
- Cream butter and sugar:
- Run the mixer until it’s pale and fluffy; if you listen, you’ll hear the texture change from grainy to smooth.
- Add in eggs and vanilla:
- Beat eggs in one by one—each addition should disappear before the next; then, stir in vanilla for inviting warmth.
- Combine wet ingredients:
- Mix buttermilk, rosé, and vinegar together—the kitchen will hum with a faint wine scent, making you want a celebratory sip.
- Build the batter:
- Alternate adding dry and wet mixtures into the butter base until just smooth, resisting the urge to overmix (that’s how you keep velvet, not rubber).
- Color the batter:
- Drop in the pink gel a little at a time, swirling gently until you land on your perfect blush shade.
- Bake:
- Divide batter evenly, smoothing the tops, and bake until your kitchen smells like a celebration and a toothpick comes out clean.
- Cool cakes:
- Let them rest in pans briefly, then onto wire racks—don’t rush or they’ll crumble when handled warm.
- Frosting time:
- Beat together butter and cream cheese until silky; gradually add powdered sugar before whisking in rosé and vanilla, aiming for a dreamy, spreadable cream.
- Layer and crumb coat:
- Stack cakes with frosting in between, sweep on a thin crumb coat, and chill so your final layer goes on neat and smooth.
- Make the gold drip:
- Warm white chocolate and cream together until just melted, then let cool; gently drip along cake edges once thick enough to flow slowly.
- Paint the gold:
- Mix luster dust with vodka, then brush over the set white chocolate until it’s gleaming—feel a bit like a cake artist in the process.
- Chill and serve:
- Refrigerate at least half an hour so everything sets, then slice and let the oohs and aahs ensue.
 Save to Pinterest
 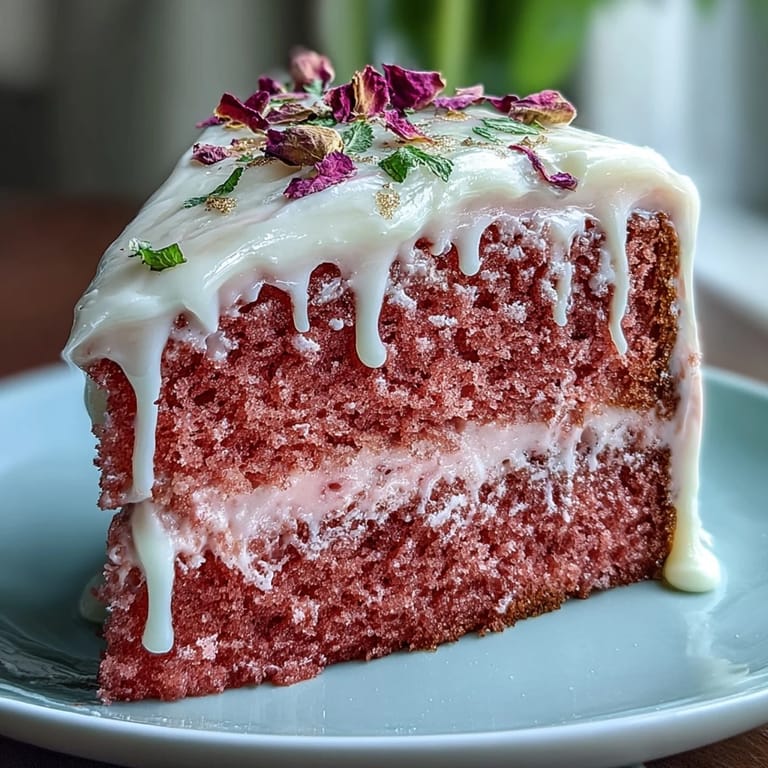 Save to Pinterest
 This cake became more than just sugar and flour at my cousin’s engagement—when she burst into happy tears over the shimmering gold drip, suddenly the hours spent in the kitchen felt like a tiny part of something bigger. We all agreed it was the kind of cake that makes a celebration linger long after the plates are empty.
Getting That Elegant Drip Effect Just Right
White chocolate can be a little unpredictable, so make sure your drip mixture cools enough to thicken—if it’s runny, your cake ends up with gold puddles instead of regal stripes. I’ve found that using a squeeze bottle gives you more control along the edge, but a spoon and a steady hand work beautifully too if that’s what you have. Painting on the gold luster takes patience; use a gentle touch and let layers dry between coats for the richest finish.
Rosé Choices and Flavor Tweaks
I tried a few rosés before finding one that let the cake sing—avoid anything too sweet or too acidic, as those overwhelmed the subtle cocoa notes for me. If you’d rather not use wine, sparkling grape juice does the trick for a sophisticated flavor without alcohol. Brushing the cooled layers with extra rosé is a move I first hesitated to try, but it makes the cake taste truly special (especially if it will be served to grown-ups only).
Decorating for Special Occasions
When I want the cake to look extra lavish, a few edible flowers, fresh berries, or a scattering of gold leaf take it to another level—everyone loves a little flourish. It’s the finishing touches that make the cake a centerpiece, so don’t skip your favorite detail, even if it’s just a simple swirl on top.
- Let each frosting layer chill for 10 minutes to keep things tidy
- Bring cake to room temp 30 minutes before slicing for softest texture
- If you’re painting gold in a hurry, use short strokes and build in thin layers
 Save to Pinterest
  Save to Pinterest
 However you decorate, I hope this cake helps a celebration feel extraordinary—and that you savor every slice with people you love.
Recipe FAQs
- → How can I intensify the rosé flavor?
Brush cooled layers with a little reserved rosé wine or reduce rosé gently on the stove to concentrate its flavor and brush between layers for a stronger note without adding liquid volume.
- → What non-alcoholic swap keeps flavor?
Use sparkling grape juice or a concentrated white grape reduction with a splash of pink cranberry for acidity; apply sparingly so layers don’t become soggy.
- → How do I get an even blush color?
Add pink gel coloring a drop at a time, mixing thoroughly between additions. Gel gives vibrant color without thinning the batter—stop when you reach the desired shade.
- → Tips for a smooth cream cheese finish?
Chill the crumb-coated cake for at least 30 minutes before the final coat, use an offset spatula and warm the spatula under hot water then dry for ultra-smooth swipes.
- → How to make a stable gold drip?
Melt white chocolate with warm cream to a glossy ganache, cool until slightly thickened so it holds on the edge, then drip with a spoon or squeeze bottle before painting with edible gold mixture.
- → Best way to assemble neat layers?
Level each layer with a serrated knife, place a dab of frosting under the bottom layer to anchor it, apply an even layer of filling, and chill briefly after stacking before final frosting.